Syringe pump & pH stat
For an experiment I wanted to measure how quickly certain alkaline minerals, such as Mg(OH)₂ or MgSiO4 dissolve in seawater under constant pH. For a large enough volume of water this is a reasonable assumption but I needed to do it in a small volume. That would require the use of a tiny amount of Mg(OH)₂ and that would make it rather noisy to measure. However using a larger quantity doesn’t work because dissolving Mg(OH)₂ releases OH- ions and thus increases the pH, which significantly slows further dissolution. So I decided to use a pH-stat which would inject a tiny amount of HCl if the pH increased above the set point (8.1 in my case). The rate at which HCl was injected would then be directly proportional to the amount of Mg(OH)₂ that had dissolved. This means the injector needs to keep very accurate account of the amount of HCl dispensed.
To build a simple pH stat I used a syringe (30ml) mounted on a linear motor connected to a controller driven by a Raspberry Pi. The controller also has a pH electrode. This way the code on the Pi can run the control loop and actuate the linear motor whenever the pH increases while also keeping track of the exact movement of the motor and hence the exact quantity of HCl dispensed.
The design was as follows:
Computer controller
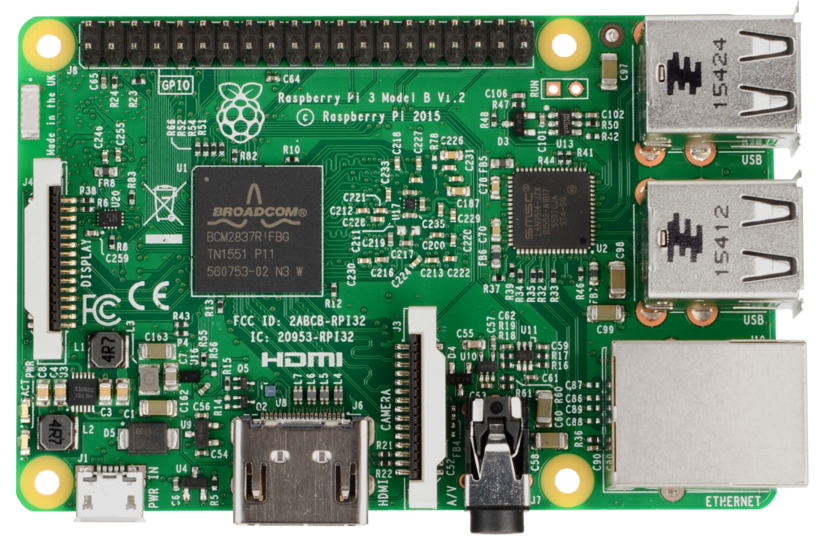
A Raspberry Pi B+ as the central coordinating unit which will read from the pH probe and determine the syringe movements. Since I wanted log files and a full Unix system this was a preferred choice over using a Arduino or similar smaller microcontroller, though that’s a viable alternative. Critical are an I2C port for communication with the pH probe, 2 GPIO outputs for stepping and direction control and two input GPIOs for the limit switches. Optional are additional GPIOs to dynamically set the step size (substepping).
pH Measurement
-
The pH electrode was purchased from Atlas Scientific (Gen 3 Lab Grade pH Probe )
-
The pH probe amp/ADC was also from Atlas Scientific ( EZO™ pH Circuit ) together with their carrier board (Electrically Isolated EZO™ Carrier Board ) which provides electrical isolation. These boards are addressable via I2C and can be essentially connected directly to the relevant pins on the Raspberry Pi. The board provides all the pH measurement and calibration commands necessary, via I2C.

The syringe assembly
-
A linear rail stepper motor. This is the one I used: 100mm Linear Actuator NEMA 11 (NEMA11) It works just like any stepper motor. This particular one wants 24V but your can actually drive it with 12V also, it just has less power. The length was determined by the length of the travel of the syringe, plus some extra.


-
A syringe. In version one I used a regular 30ml syringe with a Luer lock. From there I attached a short Luer to Luer extension tube (about 10cm) and then to a Luer lock dispenser needle. However I found that the plastic syringe and rubber plunger have too much internal flexibility and backlash and non linear response was a serious problem. So I ended up redesigning it with a 30ml glass syringe.

-
Some 3D printed parts to hold the syringe, the plunger and the limit switches in place. These have to be designed specific to the linear motor and the exact syringe used, but it is relatively straight forward to do in a CAD editor like OnShape.

Here’s a closeup of the syringe mounted in the holder.

The STEP files for the assembly are here: Syringe Holder.step
-
Two limit switches at either side of the linear stepper motod caddy, which signal back to the Pi that the end of the travel was reached. These receive 3V power from the Pi and then connect in series back to the Pi to a GPIO input pin. For visual confirmation I also added an LED via a resistor to ground, the Pi GPIO pins can sink supply current to drive these directly without a transistor.


-
To drive the motor I used a DRV8825 High Current Stepper Motor Driver Carrier. This board takes in 12V or 24V power and 3V logic signals for the direction and the steps. The four outputs are connected to the two coils inside the stepper motor. The STEP and DIRECTION pins are connected to GPIOs on the Pi and are driven directly by the code, since the precise speed/timing doesn’t matter so much as the precise control over the number of steps.

A PCB board to keep it all together.
This isn’t strictly necessary as most of the parts could just be wired together directly but I decided to to build a Raspberry Pi extension board with a GPIO header that would sit directly on top of the Pi and coordinate all the other elements. This has the advantage that everything is a lot neater and not as brittle, with patch wires running everywhere. The ciruit is quite simple:

The board hosts the DRV8825. Pins VMOT is connected to the 12V or 24V motor power supply (and 100uF cap to ground). Pins B1, B2 and A1, A2 connect to the coild on th emotor. Which pair is connected to which coil will determine the direction but that’s easily switchable in software so it doesn’t matter at assembly time. Pin DIR sets the direction, set to high mean one way, set to low means the other way. This is directly connected to the header on GPIO21. The pin STEP drives the motor. Every rising edge on this pin steps the motor one step or microstep. The pins MS1-3 set the microstep size. In this case I chose the finest microstepping available, 1/32 steps, by setting all three pins to high. Howevver to keep things configurable later i decided to provide the setting both by jumpers on the board but also by GPIO output pins in case I later decided I needed to change things dynamically.
The board also has a barrel plug for the 12V/24V supply and an 8 pin connector to go to the linear motor.
I designed a board on EasyEDA and had it manufactured. The Gerber files for the PCB are downloadable here:
<a href=”“/assets/syringepump/syringepump_gerber.zip”>[Gerber ZIP file]</a>


After soldering everything together the whole assembly looked like this:


Final assembly
Putting it all together on an acrylic lasercut board:

Software
Below is some example code on how to drive the syringe. The VOLUME_PER_STEP constant has to be determined empirically. To do this accurately I’d let the motor draw a full syringe of distilled water, and then dispense virtually all the liquid into a preweighed beaker. I can then weigh on a precision scale again and divide the number of steps taken. Distilled water is pretty damn close to a density of 1 so that was good enough for me. For an even more accurate volume determination one could calibrate the density of the water with a precision bulb pipette. The AtlasI2C library can be obtained from their website.
#!/usr/bin/python3
from time import sleep
import RPi.GPIO as GPIO
import time
from AtlasI2C import AtlasI2C
from threading import Thread

DIR =  9   # Direction GPIO Pin
STEP = 10  # Step GPIO Pin
FORWARD_STOP = 25   # Limit switch forward GPIO Pin
BACKWARD_STOP = 24  # Limit switch backward GPIO Pin
STOP = [BACKWARD_STOP, FORWARD_STOP]
FORWARD = 1     # Clockwise Rotation
BACKWARD = 0    # Counterclockwise Rotation
SPR = 48   # Steps per Revolution (360 / 7.5)

## Glass 30ml syringe
# This must be measured empirically
VOLUME_PER_STEP = 6.277352941E-8 # Liters per microstep

GPIO.setmode(GPIO.BCM)
GPIO.setup(DIR, GPIO.OUT)
GPIO.setup(STEP, GPIO.OUT)
GPIO.setup(FORWARD_STOP, GPIO.IN, pull_up_down=GPIO.PUD_DOWN)
GPIO.setup(BACKWARD_STOP, GPIO.IN, pull_up_down=GPIO.PUD_DOWN)
GPIO.output(DIR, FORWARD)

_pump_pwm_speed = 0.0
_pump_pwm_thread_active = False
_pump_pwm_thread = None
_pump_pwm_count = 0
_pump_pwm_mask = 1

def _ph_thread_call():
  global _pump_pwm_speed,_pump_pwm_thread_active,_pump_pwm_count
  while _pump_pwm_thread_active:
    now_time = time.time()
    direct =  1 if _pump_pwm_speed>0 else 0
    step   =  1 if _pump_pwm_speed>0 else -1
    GPIO.output(DIR, direct)
    if abs(_pump_pwm_speed) < 0.001:
      sleep(0.1)
      continue

    if GPIO.input(STOP[direct]):
      continue

    delay = max(0,abs(0.5/_pump_pwm_speed) - 0.0000855)
    block = max(1,min(int(_pump_pwm_speed//10), 10))
    for i in range(block):
      #print("[EDGE] block=",block, " t=",time.time())
      GPIO.output(STEP, _pump_pwm_mask*GPIO.HIGH)
      sleep(delay)
      GPIO.output(STEP, _pump_pwm_mask*GPIO.LOW)
      sleep(delay)
    _pump_pwm_count += block*step

def start_pump_pwm_thread():
  global _pump_pwm_thread, _pump_pwm_thread_active
  _pump_pwm_thread_active = True
  _pump_pwm_thread = Thread(target=_ph_thread_call)
  _pump_pwm_thread.start()

def stop_pump_pwm_thread():
  global _pump_pwm_thread, _pump_pwm_thread_active
  if _pump_pwm_thread_active:
    _pump_pwm_thread_active = False
  _pump_pwm_thread.join()

def set_pump_pwm(rate):
  global _pump_pwm_speed
  _pump_pwm_speed = min(5000,rate)
  #print("Set rate to : ", _pump_pwm_speed)

def get_pump_position():
  return _pump_pwm_count

def set_pump_dry_run(dry_run):
  global _pump_pwm_mask
  if dry_run: _pump_pwm_mask = 0
  else: _pump_pwm_mask = 1

def blocking_move_steps(steps, speed):
  pump_pwm_count = 0
  while pump_pwm_count < steps:
    now_time = time.time()
    GPIO.output(DIR, direct)
    delay = max(0,abs(0.5/speed) - 0.0000855)
    if GPIO.input(STOP[direct]):
      print("Hit backstop.")
      break
    block = max(1,min(int(speed//20), 10))
    for i in range(block):
        GPIO.output(STEP, GPIO.HIGH)
        sleep(delay)
        GPIO.output(STEP, GPIO.LOW)
        sleep(delay)
    pump_pwm_count += block
  return pump_pwm_count

#############################################
# Interface as command line tool

def main():
  parser = argparse.ArgumentParser()
  parser.add_argument('cmd', help='command')
  parser.add_argument('--speed', type=float, default=2000, help='steps/s (1-4000)')
  parser.add_argument('--steps', type=int, default=1000000, help='')
  parser.add_argument('--volume', type=float, default=None, help='volume in ml')
  parser.add_argument('--threaded', action='store_true', help="Threaded mode is inaccurate in total number of steps, if speed is high")

  args = parser.parse_args()

  if args.cmd != "bwd" and args.cmd != "fwd":
    print("[cmd] must be 'bwd' or 'fwd'")

  direct =  1 if args.cmd == "fwd" else 0
  steps = args.steps
  if args.volume:
    steps = int(args.volume*1E-3 / VOLUME_PER_STEP)

  print("Going %d steps at speed %f steps/s... (Volume = %f.3ml)"%(steps, args.speed, 1E3*steps*VOLUME_PER_STEP))

  if args.threaded: # Asynchronous version
    start_pump_pwm_thread()
    set_pump_pwm(args.speed)
    while _pump_pwm_count < steps:
      time.sleep(0.05)
    stop_pump_pwm_thread()
    print("Final steps: ", _pump_pwm_count)

  else:             # Blocking version
    pump_pwm_count = blocking_move_steps(steps, args.speed):
    print("Final steps: ", pump_pwm_count)

  print("Done.")

if __name__ == '__main__':
  main()
pH measurement code
Below is example code which will take pH measurements from the pH electrode. On disadvantage of the Atlas measurement board is that it’s fairly slow. A measurement takes ~1s, which makes fast reaction tricky.
#!/usr/bin/python3
import time
from AtlasI2C import (
	 AtlasI2C
)
import argparse
from threading import Thread

def print_devices(device_list, device):
    for i in device_list:
        if(i == device):
            print("--> " + i.get_device_info())
        else:
            print(" - " + i.get_device_info())

def get_devices():
    device = AtlasI2C()
    device_address_list = device.list_i2c_devices()
    device_list = []
    print(device_address_list)
    for i in device_address_list:
        device.set_i2c_address(i)
        response = device.query("I")
        if response.startswith("Error"):
          continue
        moduletype = response.split(",")[1]
        response = device.query("name,?").split(",")[1]
        device_list.append(AtlasI2C(address = i, moduletype = moduletype, name = response))
    return device_list


# Background pH service (Seperate thread)
_pH_thread_active = False
_pH_thread = None
_pH_readings = []
_pH_reading_times = []

def _ph_thread_call(device, pH_finetune=0.0, callback=None):
  global _pH_readings, _pH_reading_times, _pH_thread_active
  while _pH_thread_active:
    now_time = time.time()
    try:
      pHstring = device.query("R")
    except IOError:
      print("PH query failed. IO Error")
      continue

    try:
      pH = float(pHstring.split(":")[-1].strip().strip('\x00')) + pH_finetune
    except ValueError:
      print("PH value invalid. ValueError")
      continue

    _pH_readings.append(pH)

    if callback: callback(pH)

def start_ph_thread(callback=None):
  global _pH_thread, _pH_thread_active
  device_list = get_devices()
  print(device_list)
  device = device_list[0]
  print_devices(device_list, device)
  _pH_thread_active = True
  _pH_thread = Thread(target=_ph_thread_call,args=(device,0.0,callback))
  _pH_thread.start()

def stop_ph_thread():
  global _pH_thread, _pH_thread_active
  _pH_thread_active = False
  if _pH_thread is not None:
    _pH_thread.join()

#############################################
# Interface as command line tool

def main():
  usage = """
   ph.py c                Measure pH continuously
   ph.py cal,mid,7.01     Calibrate Midpoint
   ph.py cal,low,4.00     Calibrate Lowpoint
   ph.py cal,high,10.05   Calibrate Highpoint
  """
  parser = argparse.ArgumentParser()
  parser.add_argument('cmd', help="")
  try:
    args = parser.parse_args()
  except:
    print(usage)
    raise

  device_list = get_devices()
  print(device_list)
  device = device_list[0]
  print_devices(device_list, device)

  # Continuous reading
  if args.cmd.lower() == "c":
    def print_ph(ph):
      print(ph)
    start_ph_thread(callback=print_ph)
    while True:
      time.sleep(1)
    return

  try:
    print(device.query(args.cmd))
  except IOError:
    print("Query failed \n - Address may be invalid, use list command to see available addresses")


if __name__ == '__main__':
    main()
To calibrate the electrode there are several commands that can be issued. Putting the electrode into the respective pH buffer, the following commands can be used to calibrate the pH board.
#python3 ph.py cal,mid,7.01
#python3 ph.py cal,high,10.04
We can now continuously read pH values.
python3 ph.py c
From here the possibilities are endless. One could program time controlled or pH controlled releases. Acid-base auto-titration is pretty easy, though it’s important to think about overshoot and the non-linearity of the pH scale.