Playa dome
For 2009, with the cube project in full swing Alissa and I decided we wanted more comfort on the playa. We had been donated a bare steel dome and so we needed to build a cover for it. Here are the construction & assembly plans, including, for sake of completeness, the design for the actual geodesic structure itself, even though we didn’t actually build it.
The geodesic steel frame
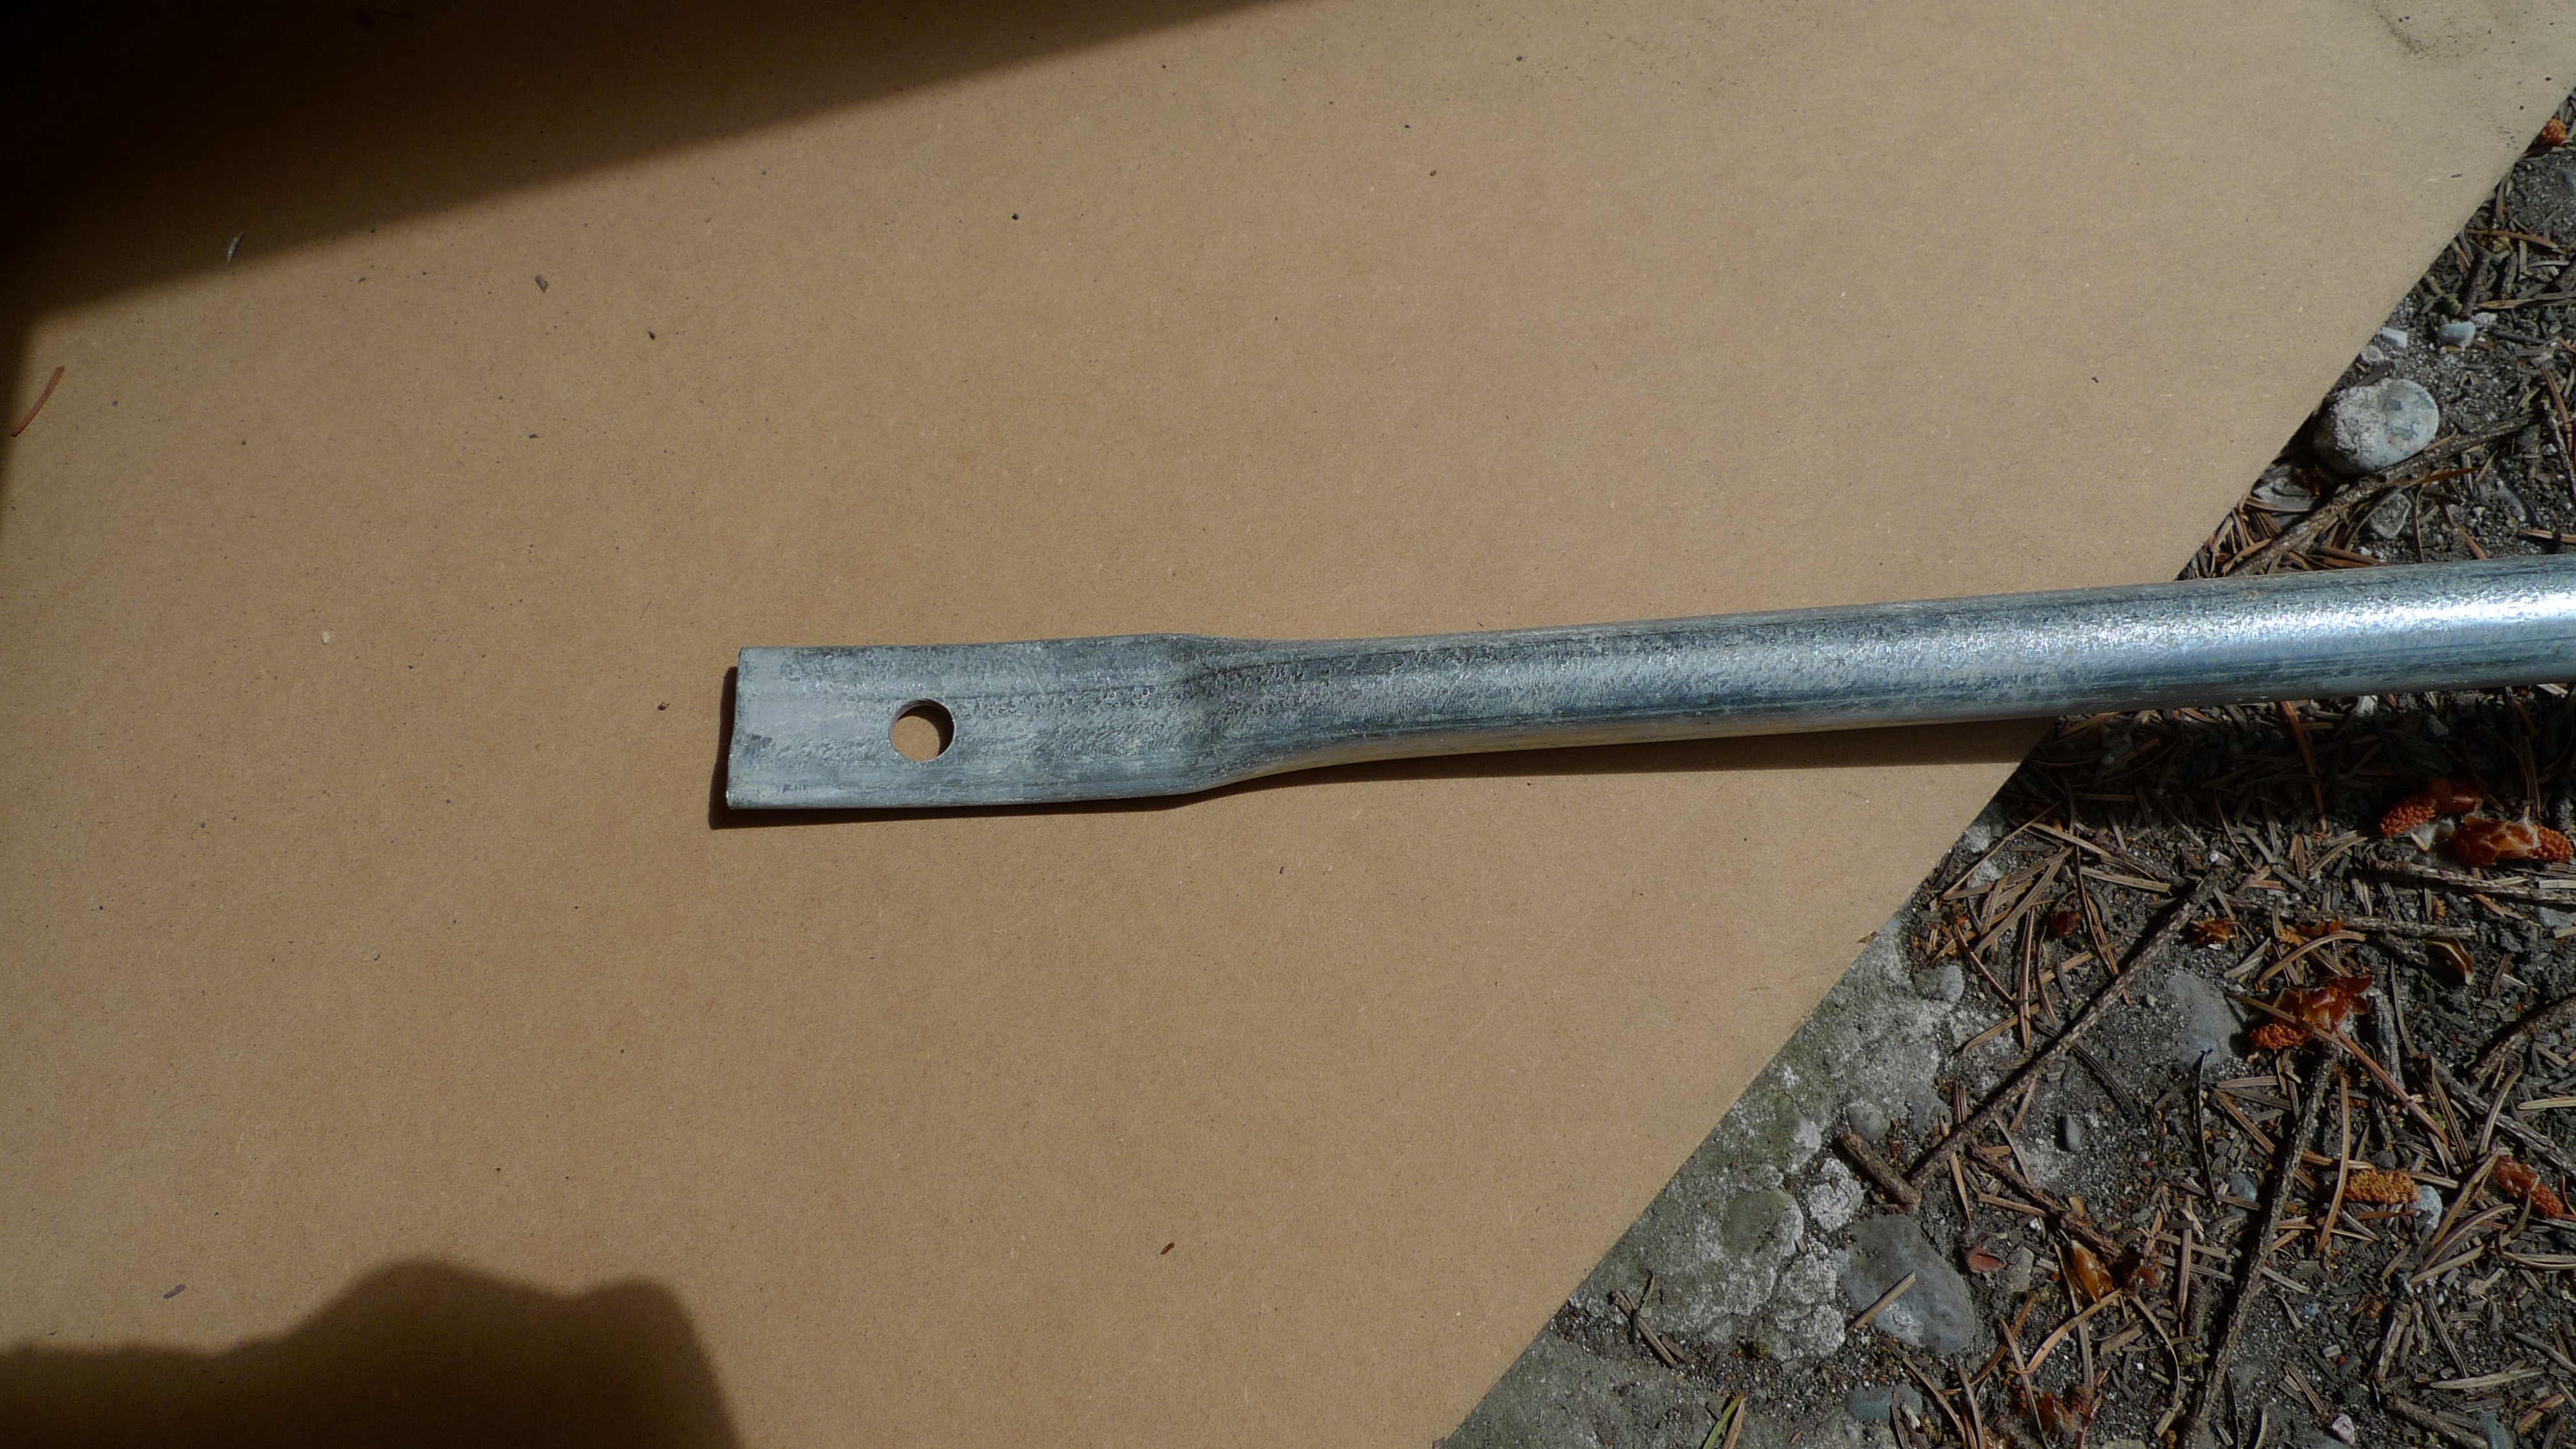
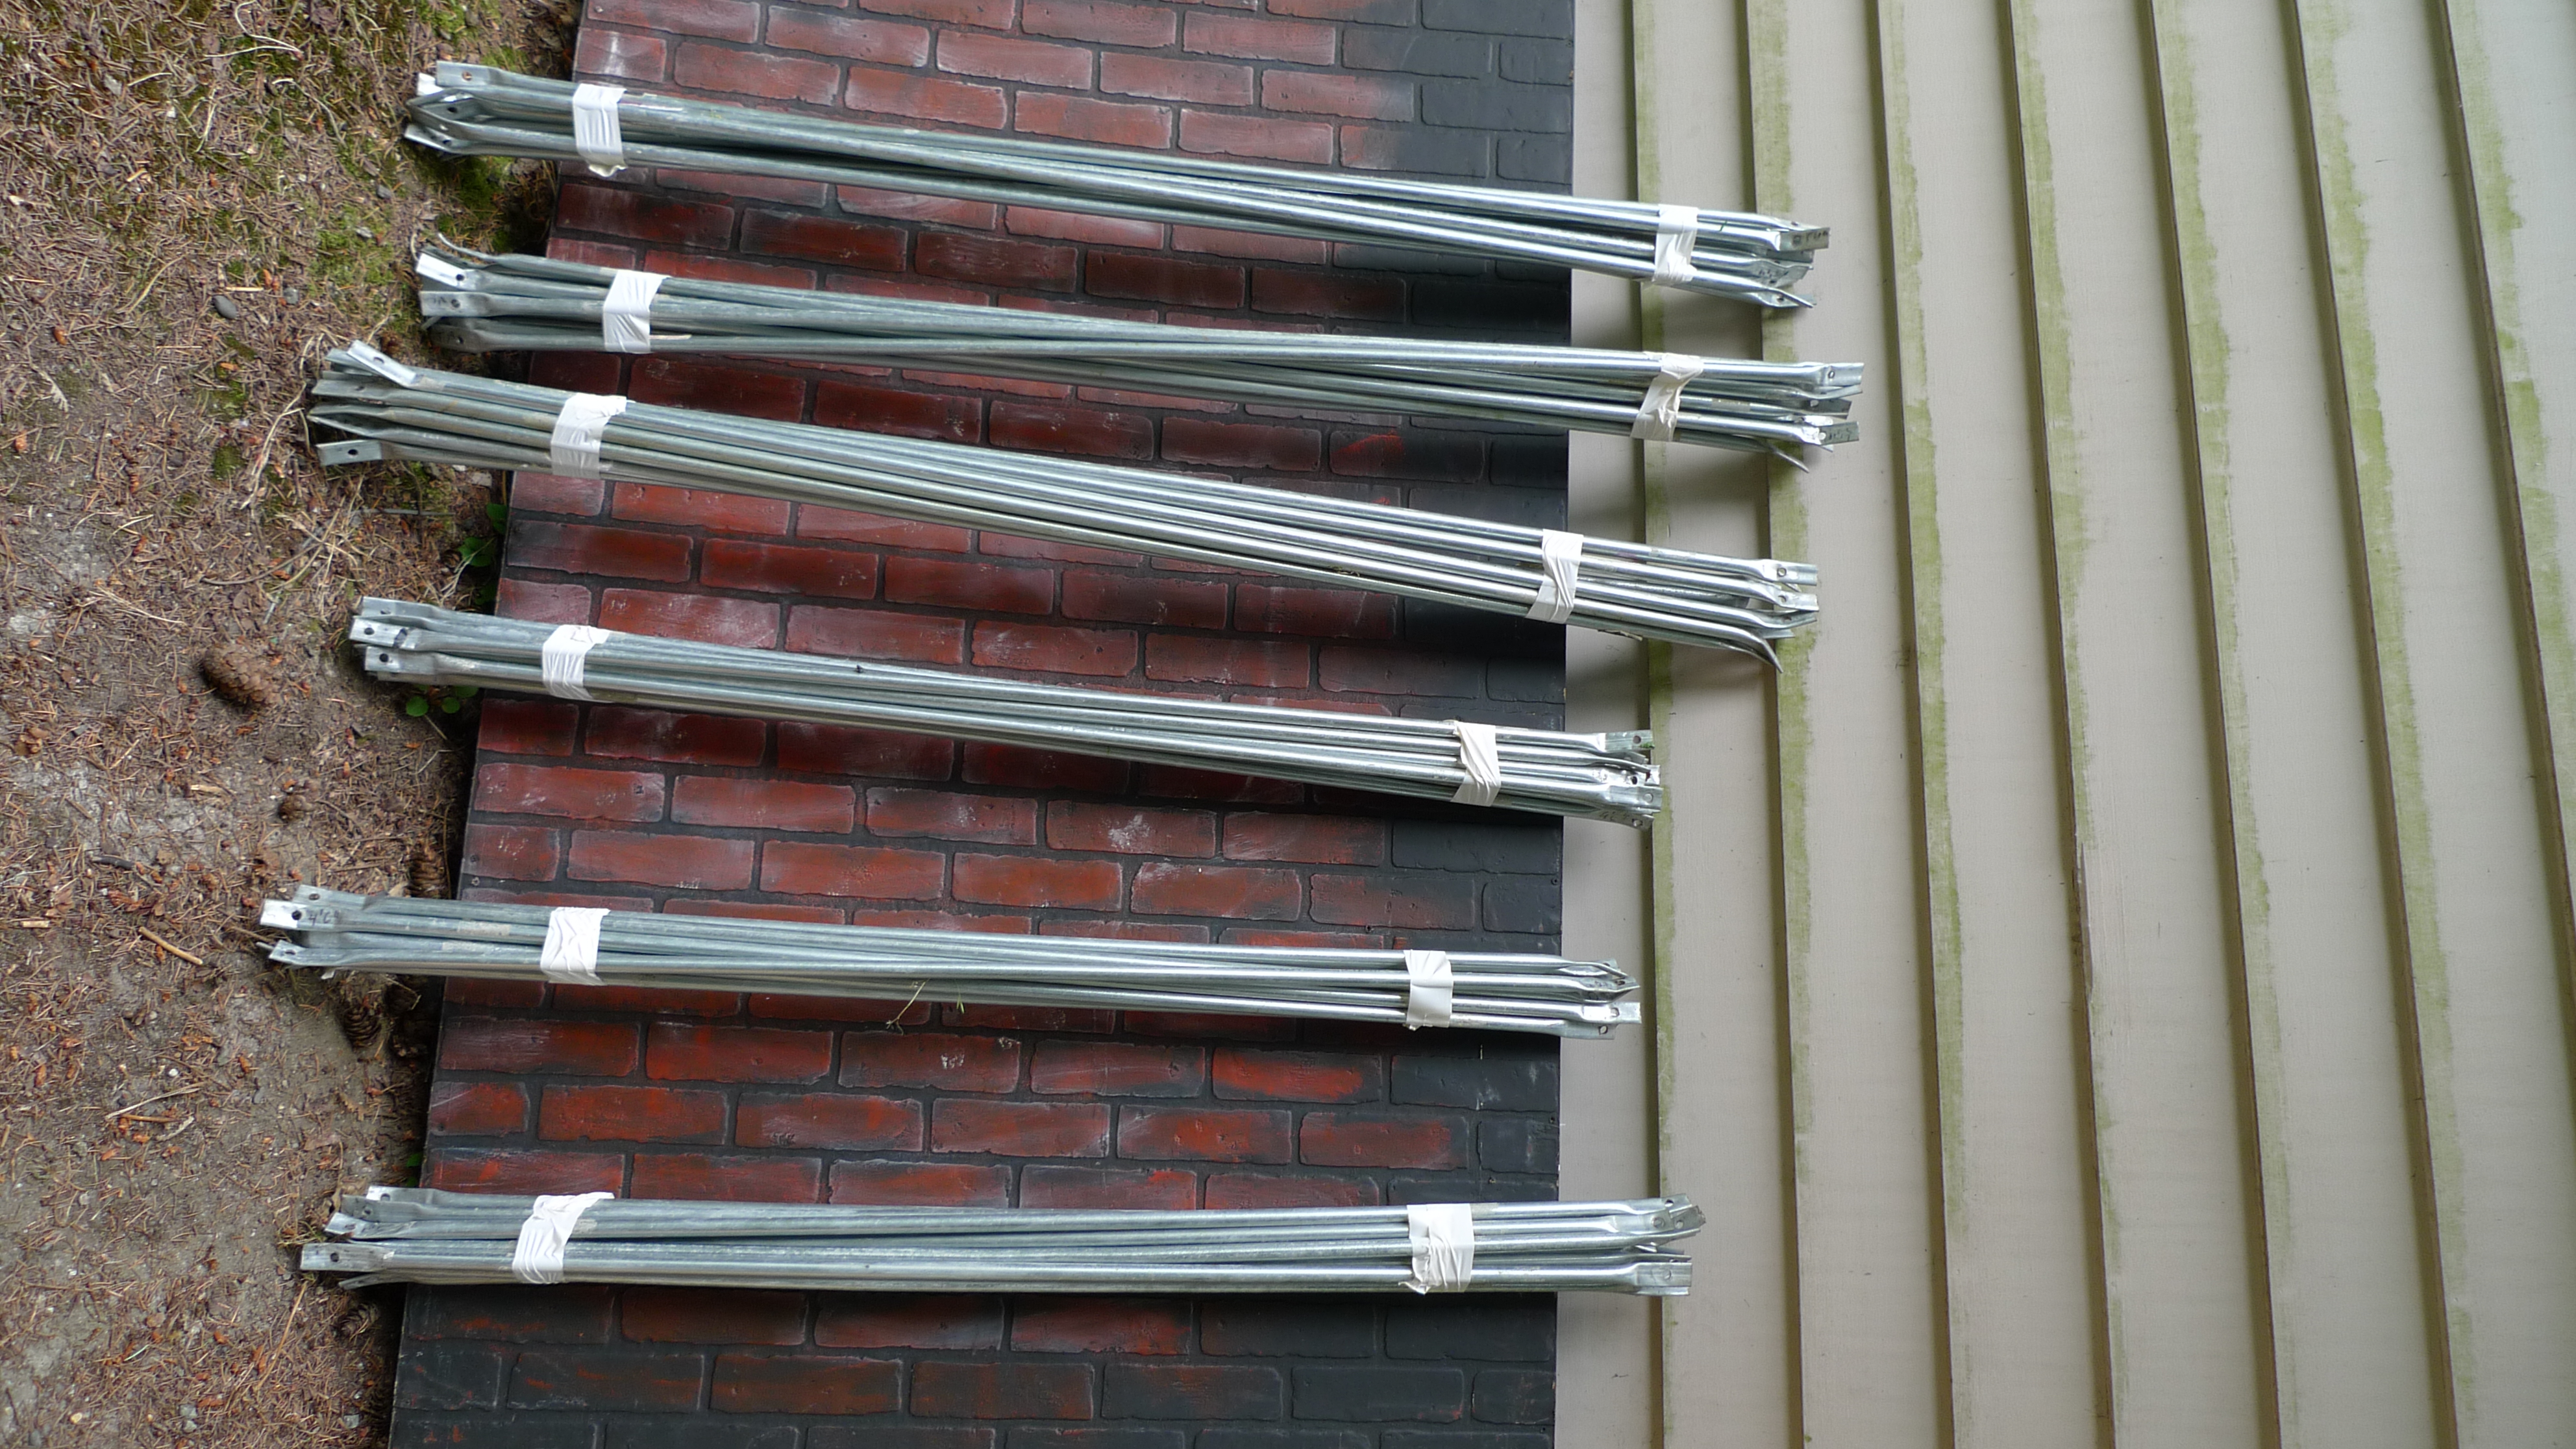
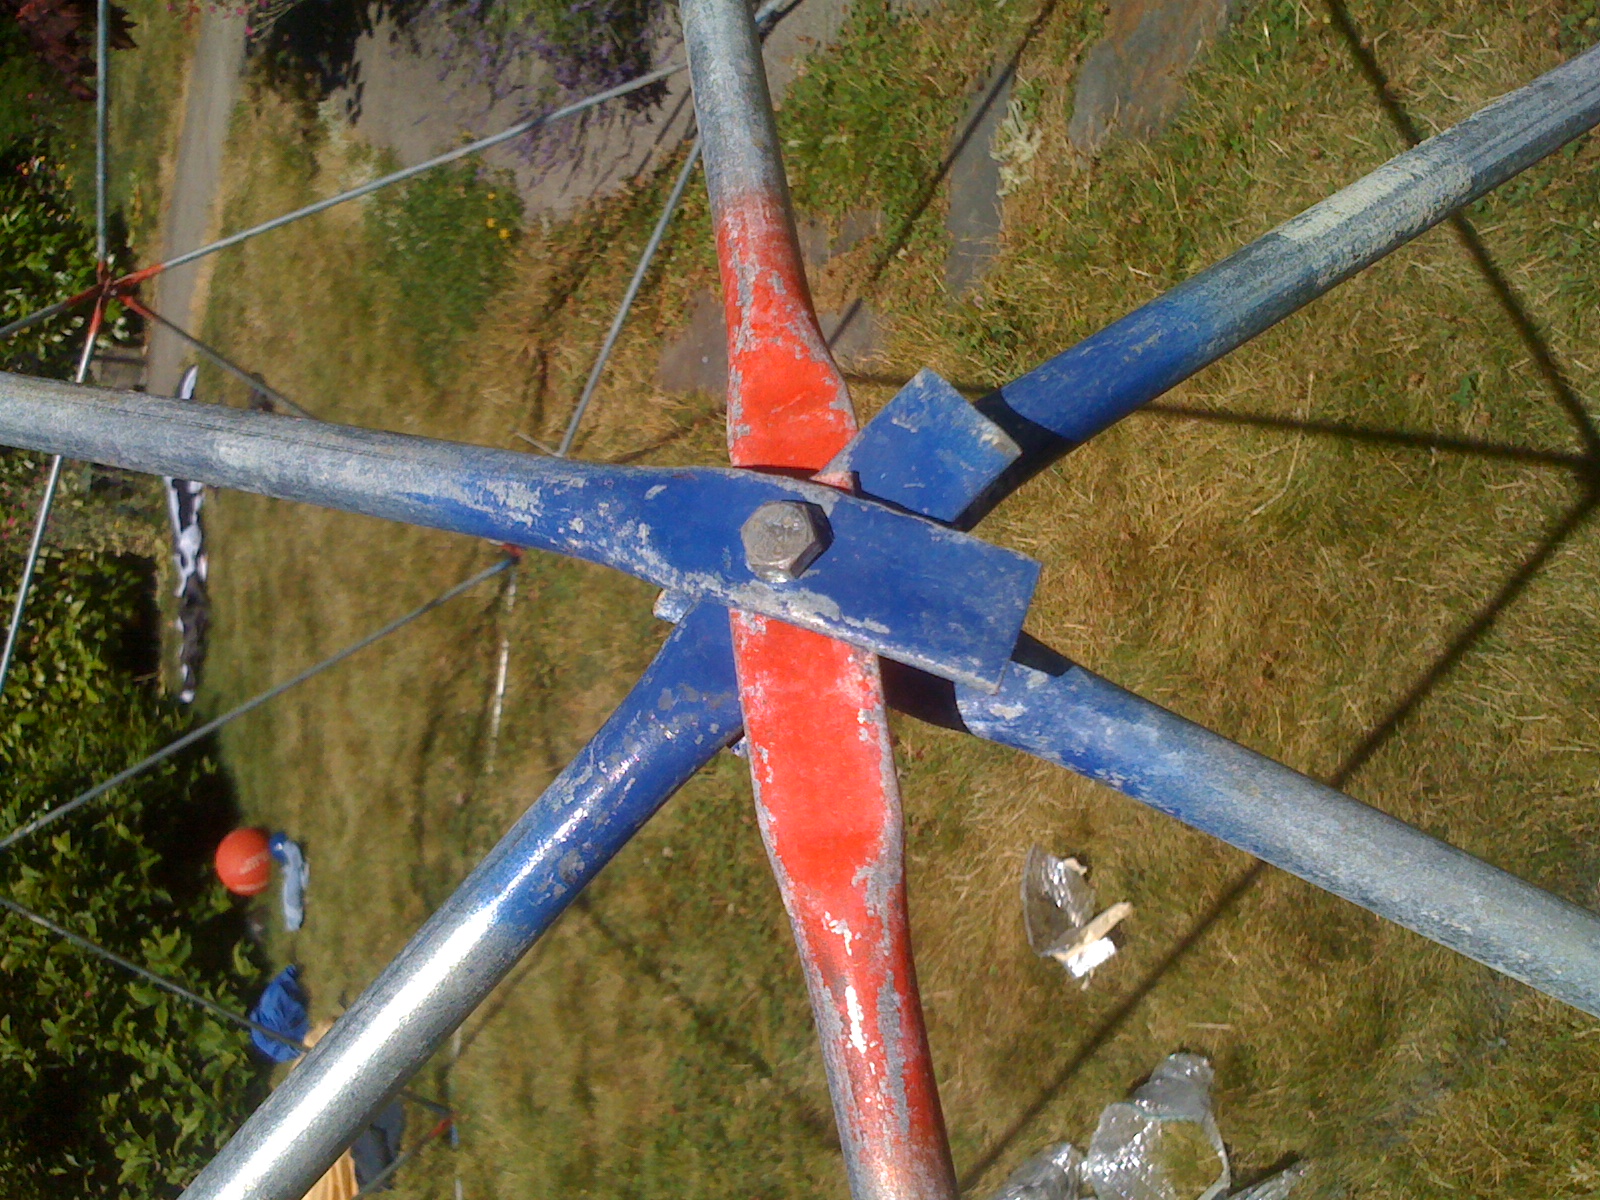
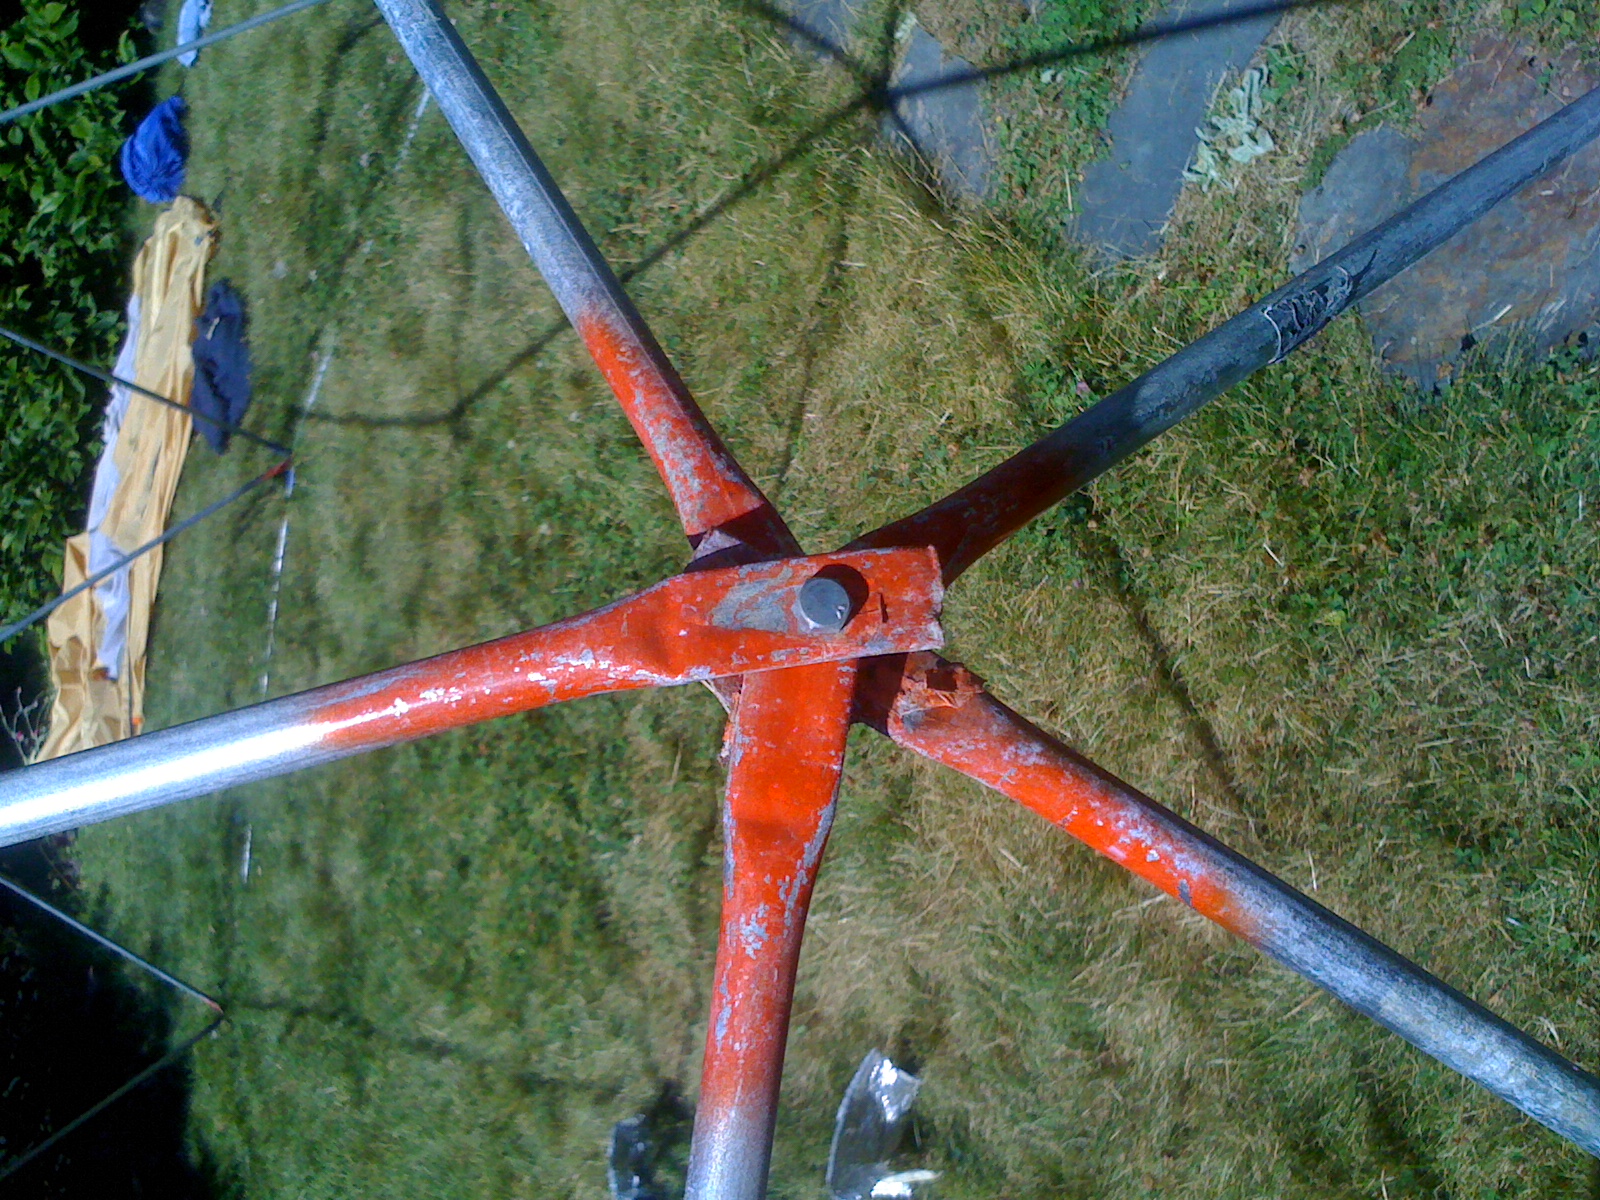
The frame is made out of 3/4″ EMT Tubing, cut into appropriate lengths (see below) and hammered flat at the ends, with 5/16×2-1/2 hex tap bolts, coarse thread, connecting them at the vertices. The dome is a 2V Dome with a radius of 8′ 3″ and a Diameter or 16’6″. Being a 2V dome it is built with 2 lengths of strut, 30 short ones (red), 4′ 9″ in length (4′ 6″ hole to hole) and 35 longer ones (blue), 5′ 4″ (5′ 1″ hole to hole) in length. A 2V Dome has 26 vertices (hence 26 bolts+bolts are needed). There will be ten 4-way connections (the 10 vertices on the ground), six 5way connections and ten 6-way connections. We used slightly shorter bolts (1 1/
2″) for the 4-way connectinos, and longer ones (2″) for the 5 and 6-way connections. Below are pictures of the struts and their ends. The hole is drilled about 1 1/4″ from the end and is big enough to comfortably let through the bolts. For construction purposes i recommend prebending these inwards a little bit, but it’s not absolutely necessary. Also spray painting the ends red/blue depending on their type (see below) was super useful (the photos below were taken before I did that).
Check out http://www.geo-dome.co.uk/2v_tool.asp for more info on 2V domes.
Also http://www.desertdomes.com/formula.html has a neat calculator for strut lengths.
Assembly diagram (side view)
Top view:
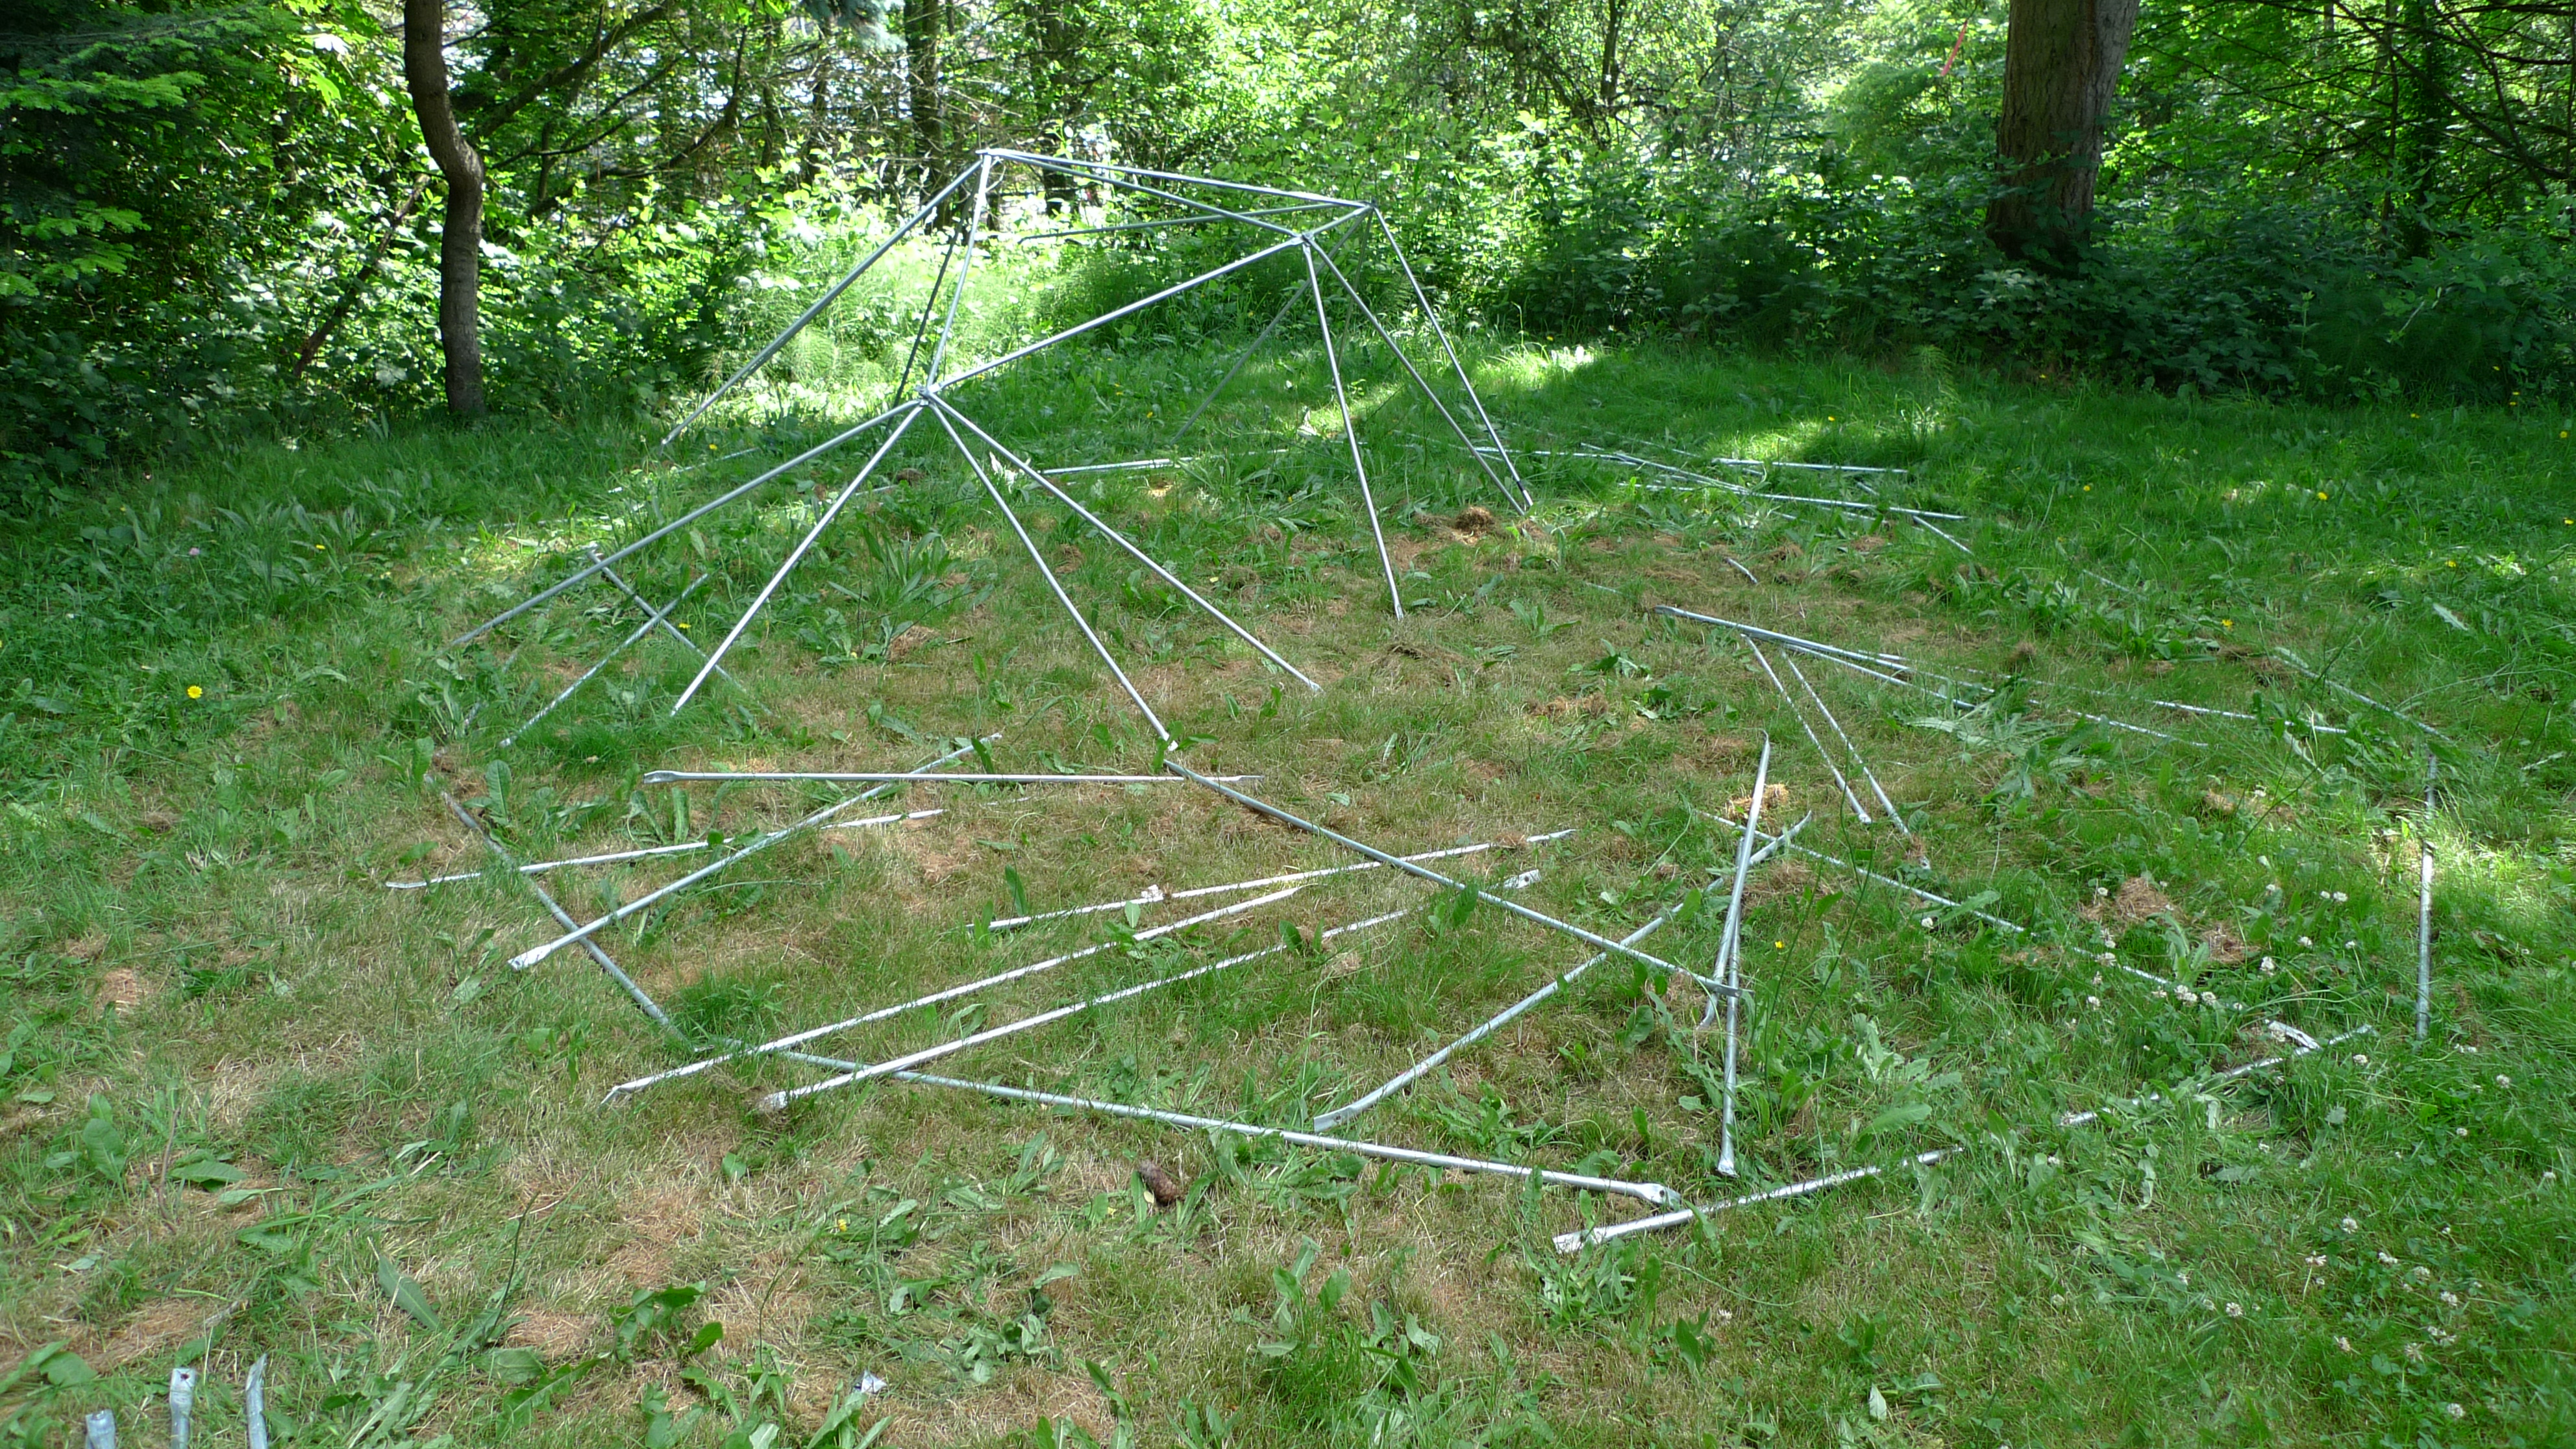
The assembly is easiest done from top to bottom. I.e. start assembling the central pentagon and work outwards, sort of walking the structure up. This can be done alone (i had to do that once while trying out the cover)
but is much easier with two people, esp. towards the end. A great page with intructions we used is here: http://www-graphics.stanford.edu/~munzner/dome/struts/
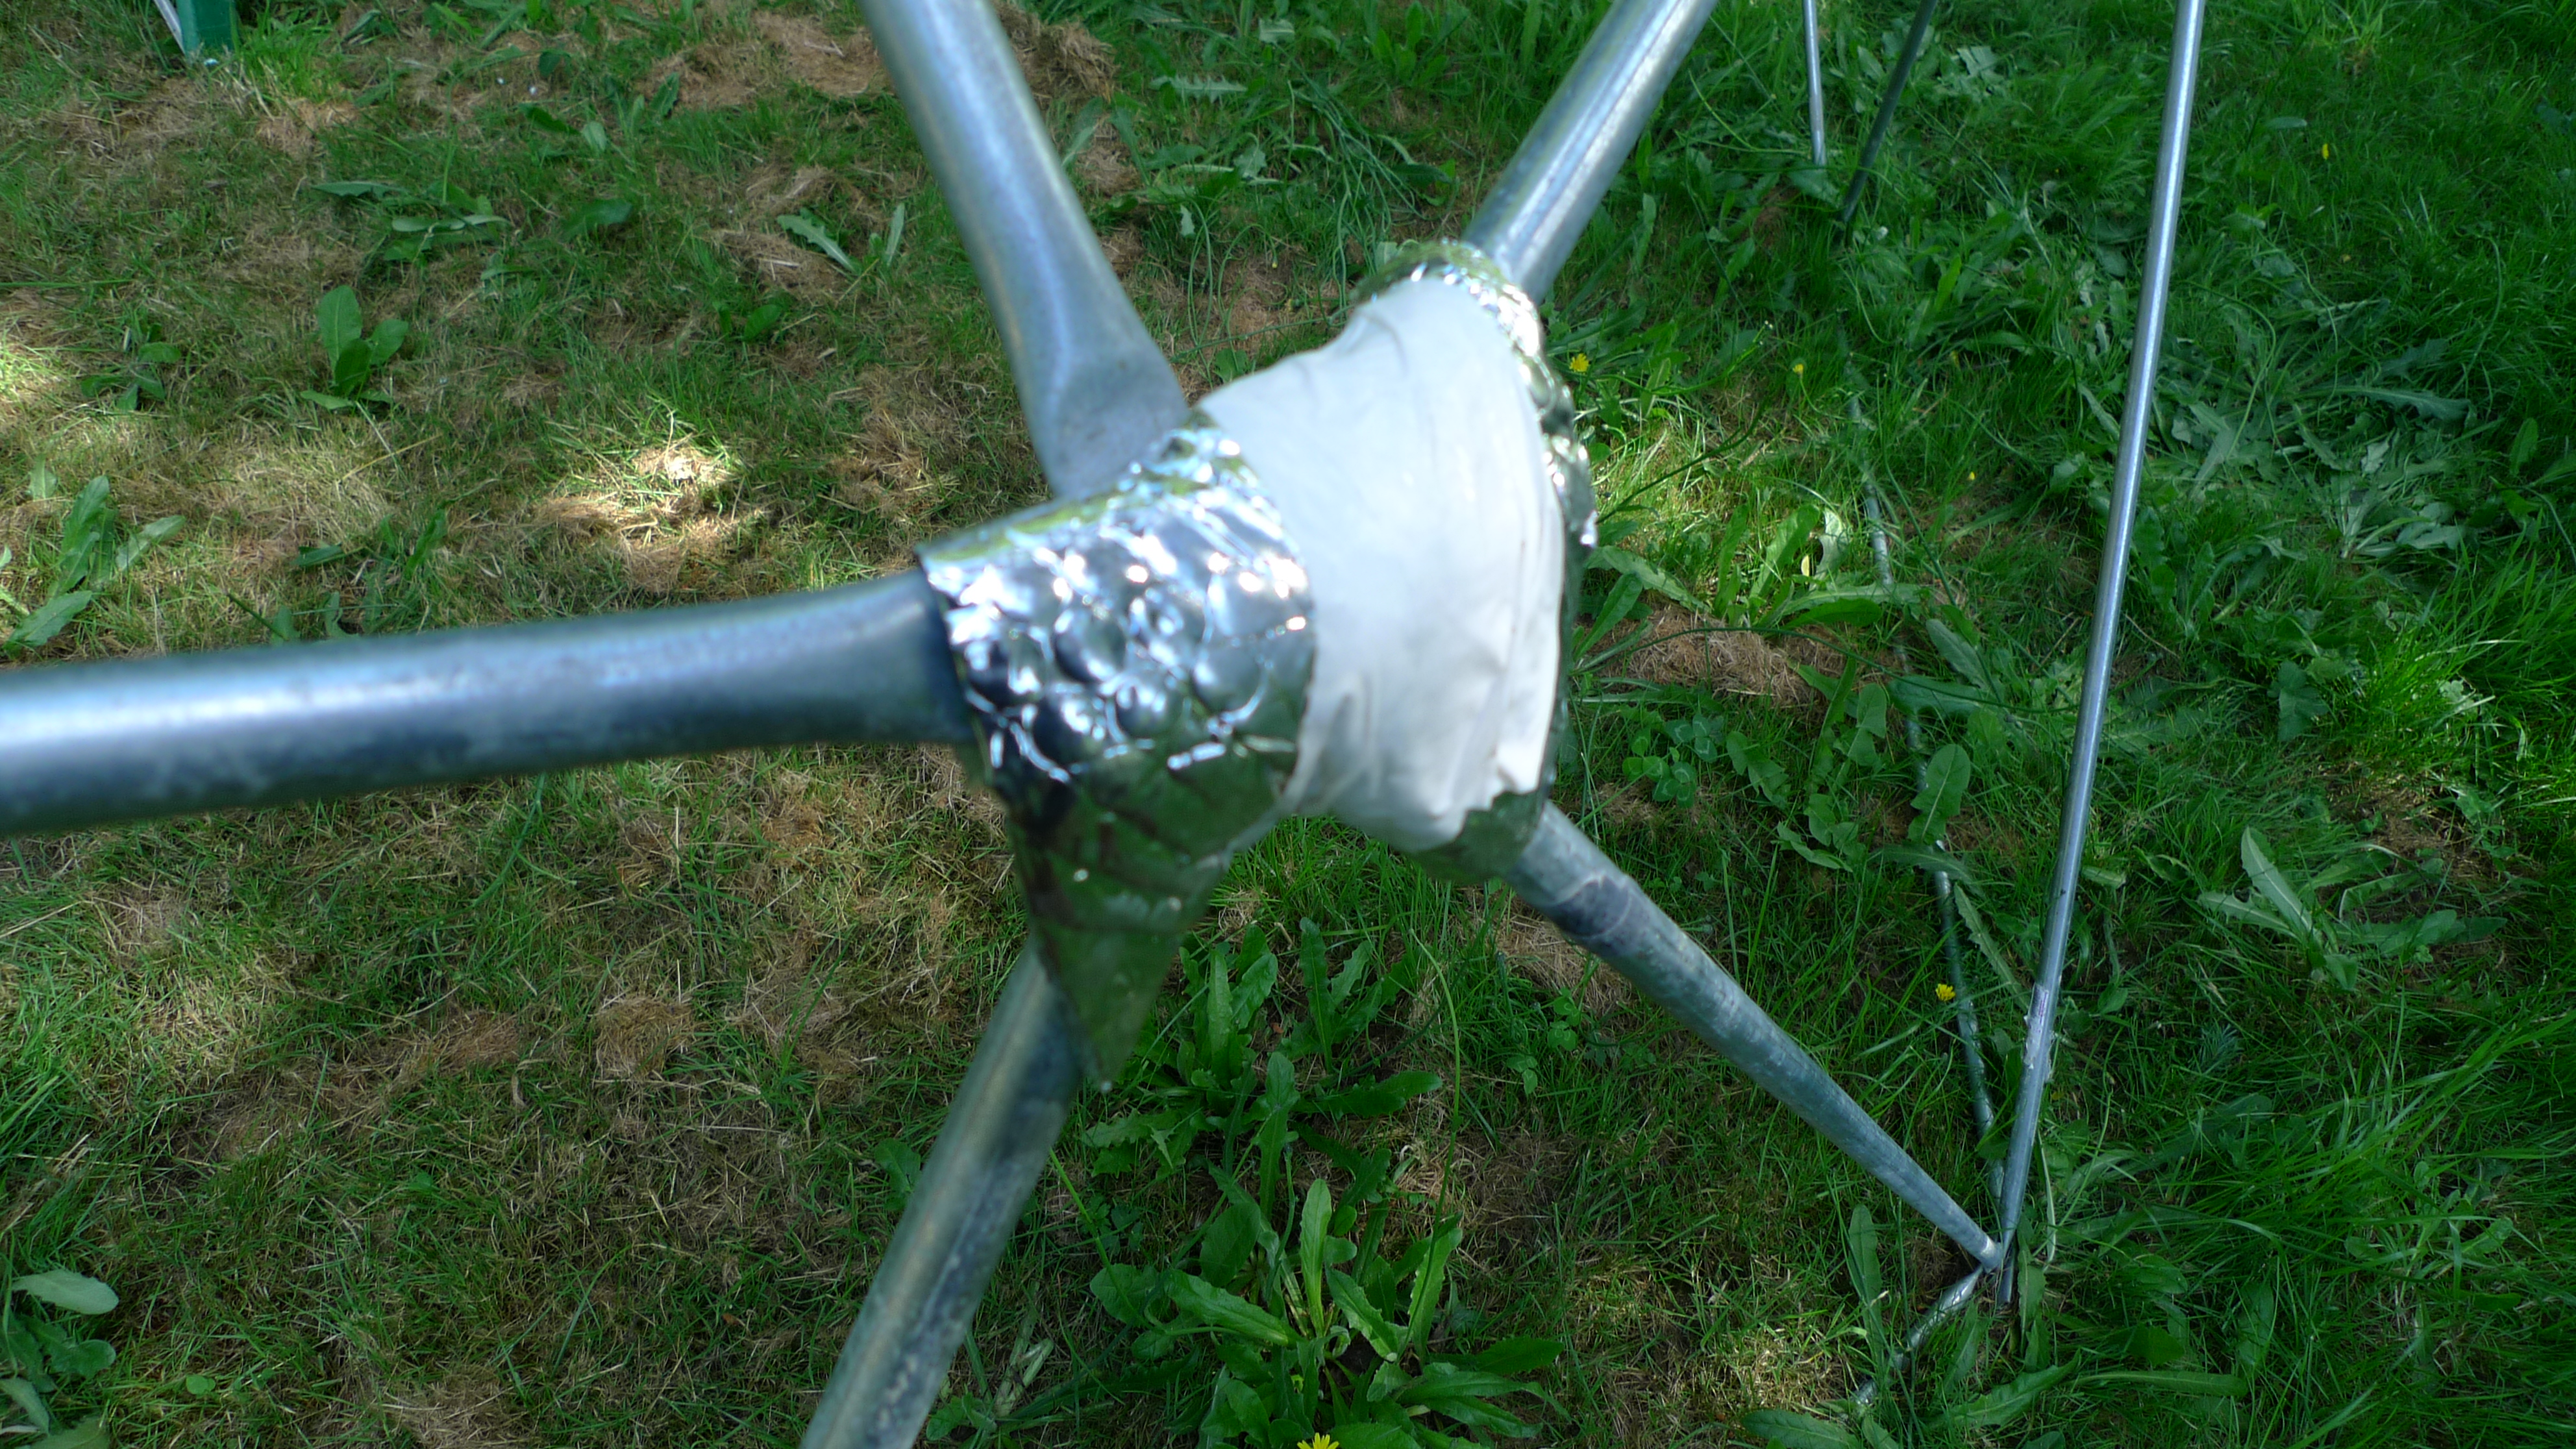
 At the end i wrapped scrap pieces of Reflectix with a bit of tape around the corner points such that the sharp edges wouldn’t tear into the cover.
Data Summary:
2V Dome, Radius: 8’ 3”, Diameter: 16’ 6”
Strut ‘A’, Red, 30 short ones, 4’ 6” Strut ‘B’, Blue, 35 long ones, 5’ 1”
26 Vertices: 4-way connectors: 10 5-way connectors: 6 6-way connectors: 10
Links for building instructions:
Building the dome cover
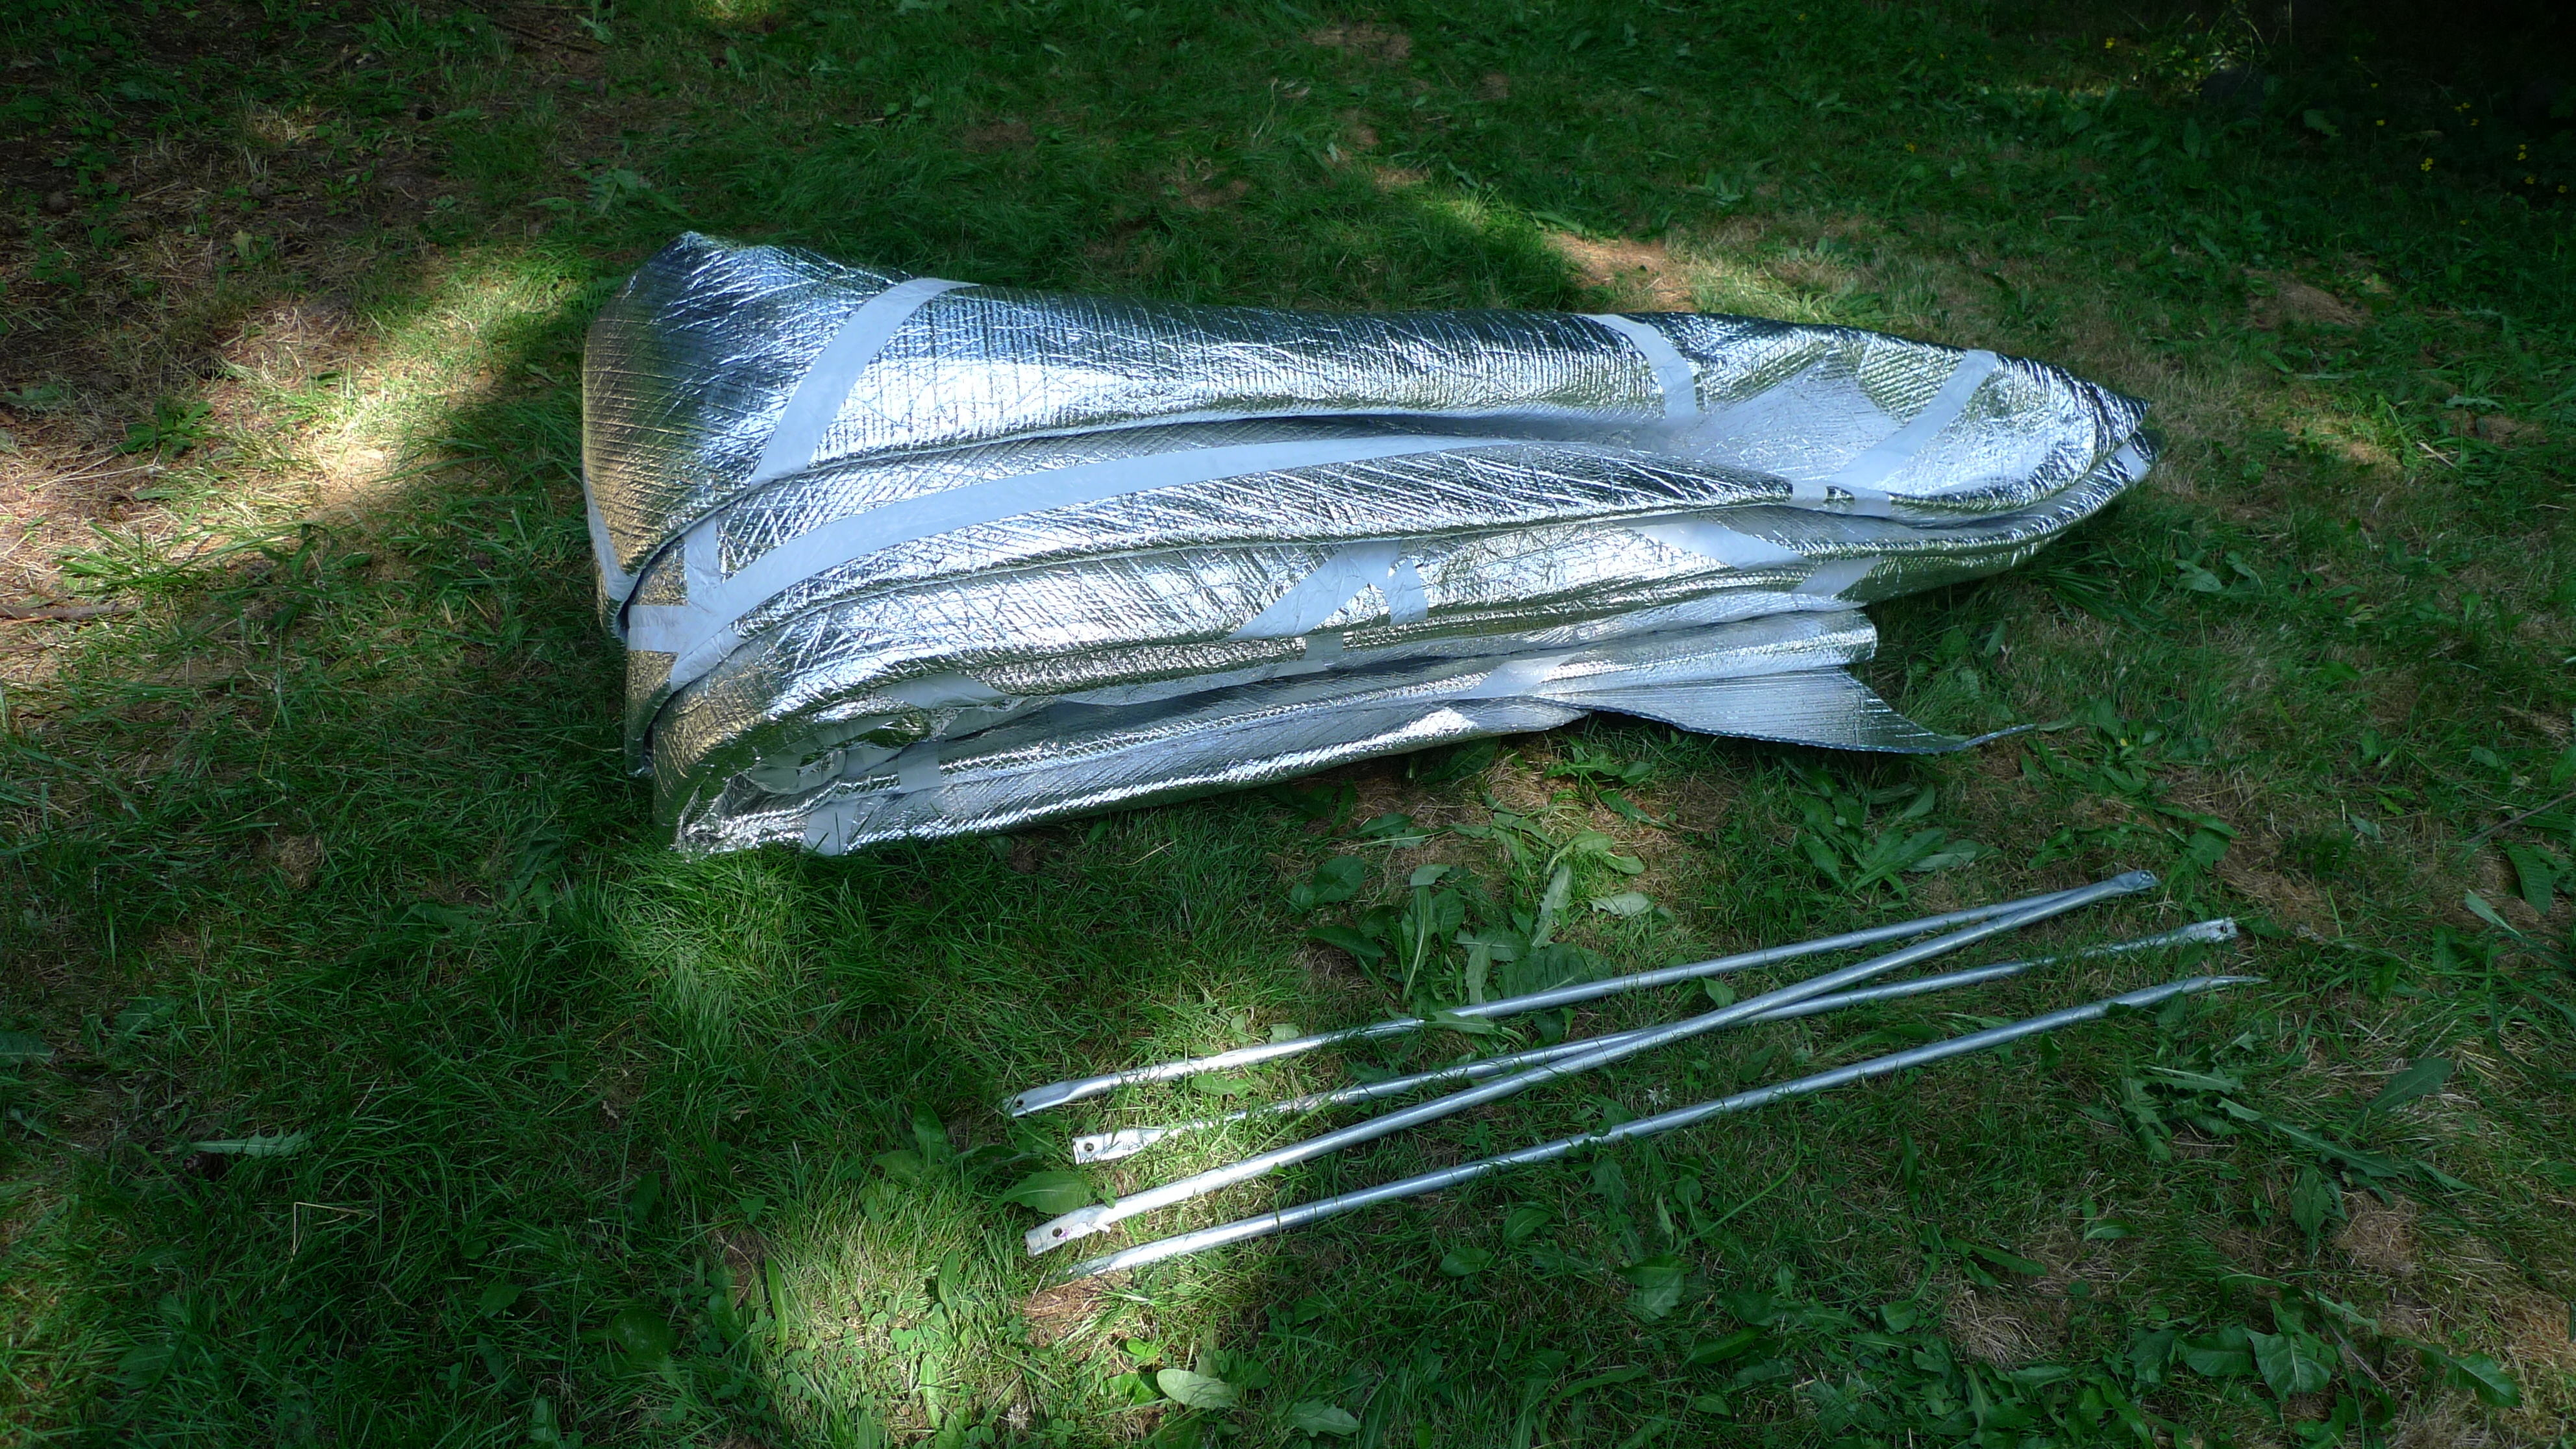
To protect against the brutal heat of the desert we built the cover of the dome using Reflectix. This is basically a stiff-ish bubble wrap coated with aluminum with radiates away 98% of the incident radiation while being insulating against the hot air during the day and the cold of the night. It’s available from Home Depot. This material is heat resistant and fairly tough. Its greatest weakness is to sharp objects which will pierce it very easily. But it is surprisingly resistant to pulling forces, and thus suitable to be used like a fabric. It is relatively expensive, but the comfort was really worth it. It comes in rolls 48″ wide, but sadly not wider then that. To connect pieces you use a special foil tape provided by Reflectix Inc. but it turns out that really any old foil tape does well, so I dont recommend buying that expensive stuff. The foil tape is v tough, even at high temperatures (we tried by glueing together two small pieces and heating it to 200F in the oven and the trying to pull the two pieces appart. The glue is completely unaffected by it and rock solid. The Reflectix itself will rip before the joint will will give. However! The tape it is highly susceptible to tearing, i.e. once you have a nick in one side, it propagates very easily and the whole joint will fail. Thus, to protect against the running of the rip, we covered all the aluminum tape with another layer of simple ducttape. Now ducttape is not very heat resistant since the glue melts but due to the interwoven fabric inside the tape it does not run. Thus the composite of aluminum foil to grip the Reflectix and the Ducttape over the top to prevent tearing worked liek a charm. Again we tested in a oven and the stuff is rock solid!

Now covering a spherical shape using flat pieces while minimising bulging, minimising the amount of tape needed (tape is expensive!) and reducing waste was a quite a challenge to work out. At first I was thinking along the lines of a sort of orange peel kind of design, but it was utterly unatisfying.I thus opted to make a geodesic design where each triangle gets its own piece of reflectix. This meant about 40% more tape, but a much much better fit to the frame (which was important to me aesthetically). Thus the whole thing was made from triangular piece, which were easy to cut and left very little waste material, since they can be tiled well.P1010499
The dimensions of the pieces are below including diagrams (to come, i can’t find my drawings right now)
I couldn’t quite get the bigger of the two triangles to fit onto the 48″ rolls (they would need to be about 54″ high) so i changed the tiling a little bit as shown below.
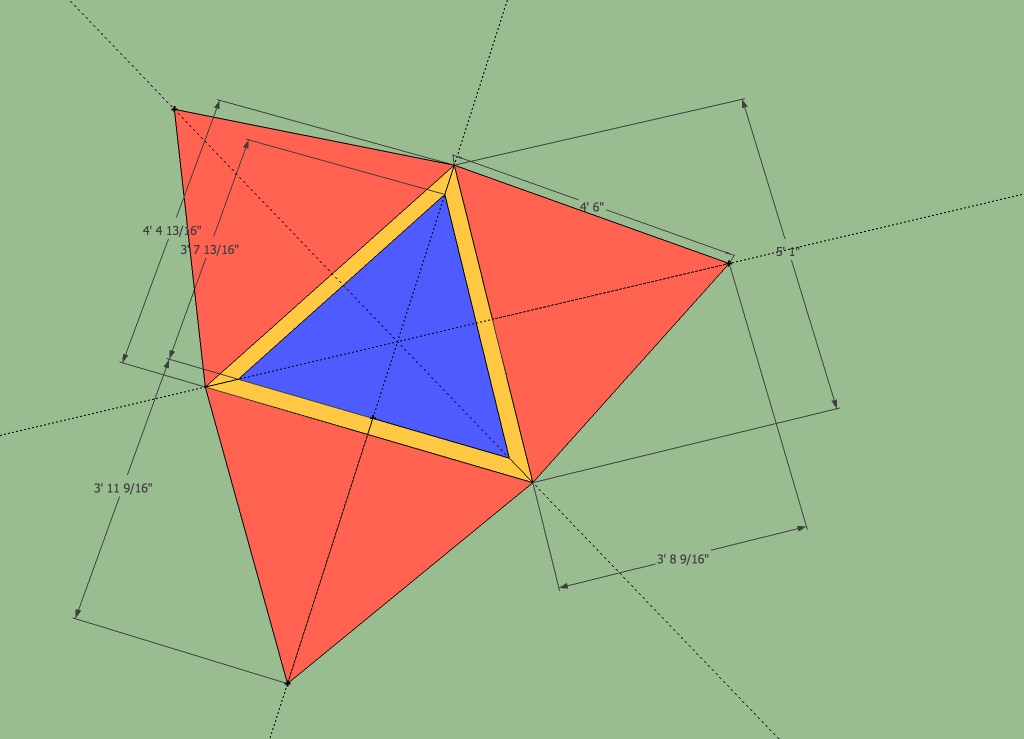
Circumferences:
Base: 10x 5’1” = 50’ 10” = 610″ Level1: 10x 4’6” = 45’ = 540″ Level2: 5x 5’2” = 25’ 5” = 305″
Width of 1st Band: h of equilateral triangle B,B,B = 0.866 * 5’1” = 4.4021’ = 4’ 5” Width of 2nd Band: h of equilateral triangle B,B,B = 0.866 * 5’1” = 4.4021’ = 4’ 5” Width of 3nd Band: h of equilateral triangle A,A,A = 0.866 * 4’6” = 4.4021’ = 3’11” or lenght of short strut = 4′ 6″ Total arc length: 12’ 9”
Width of Rolls
4′ = 48″
The final result in Alissa’s garden:
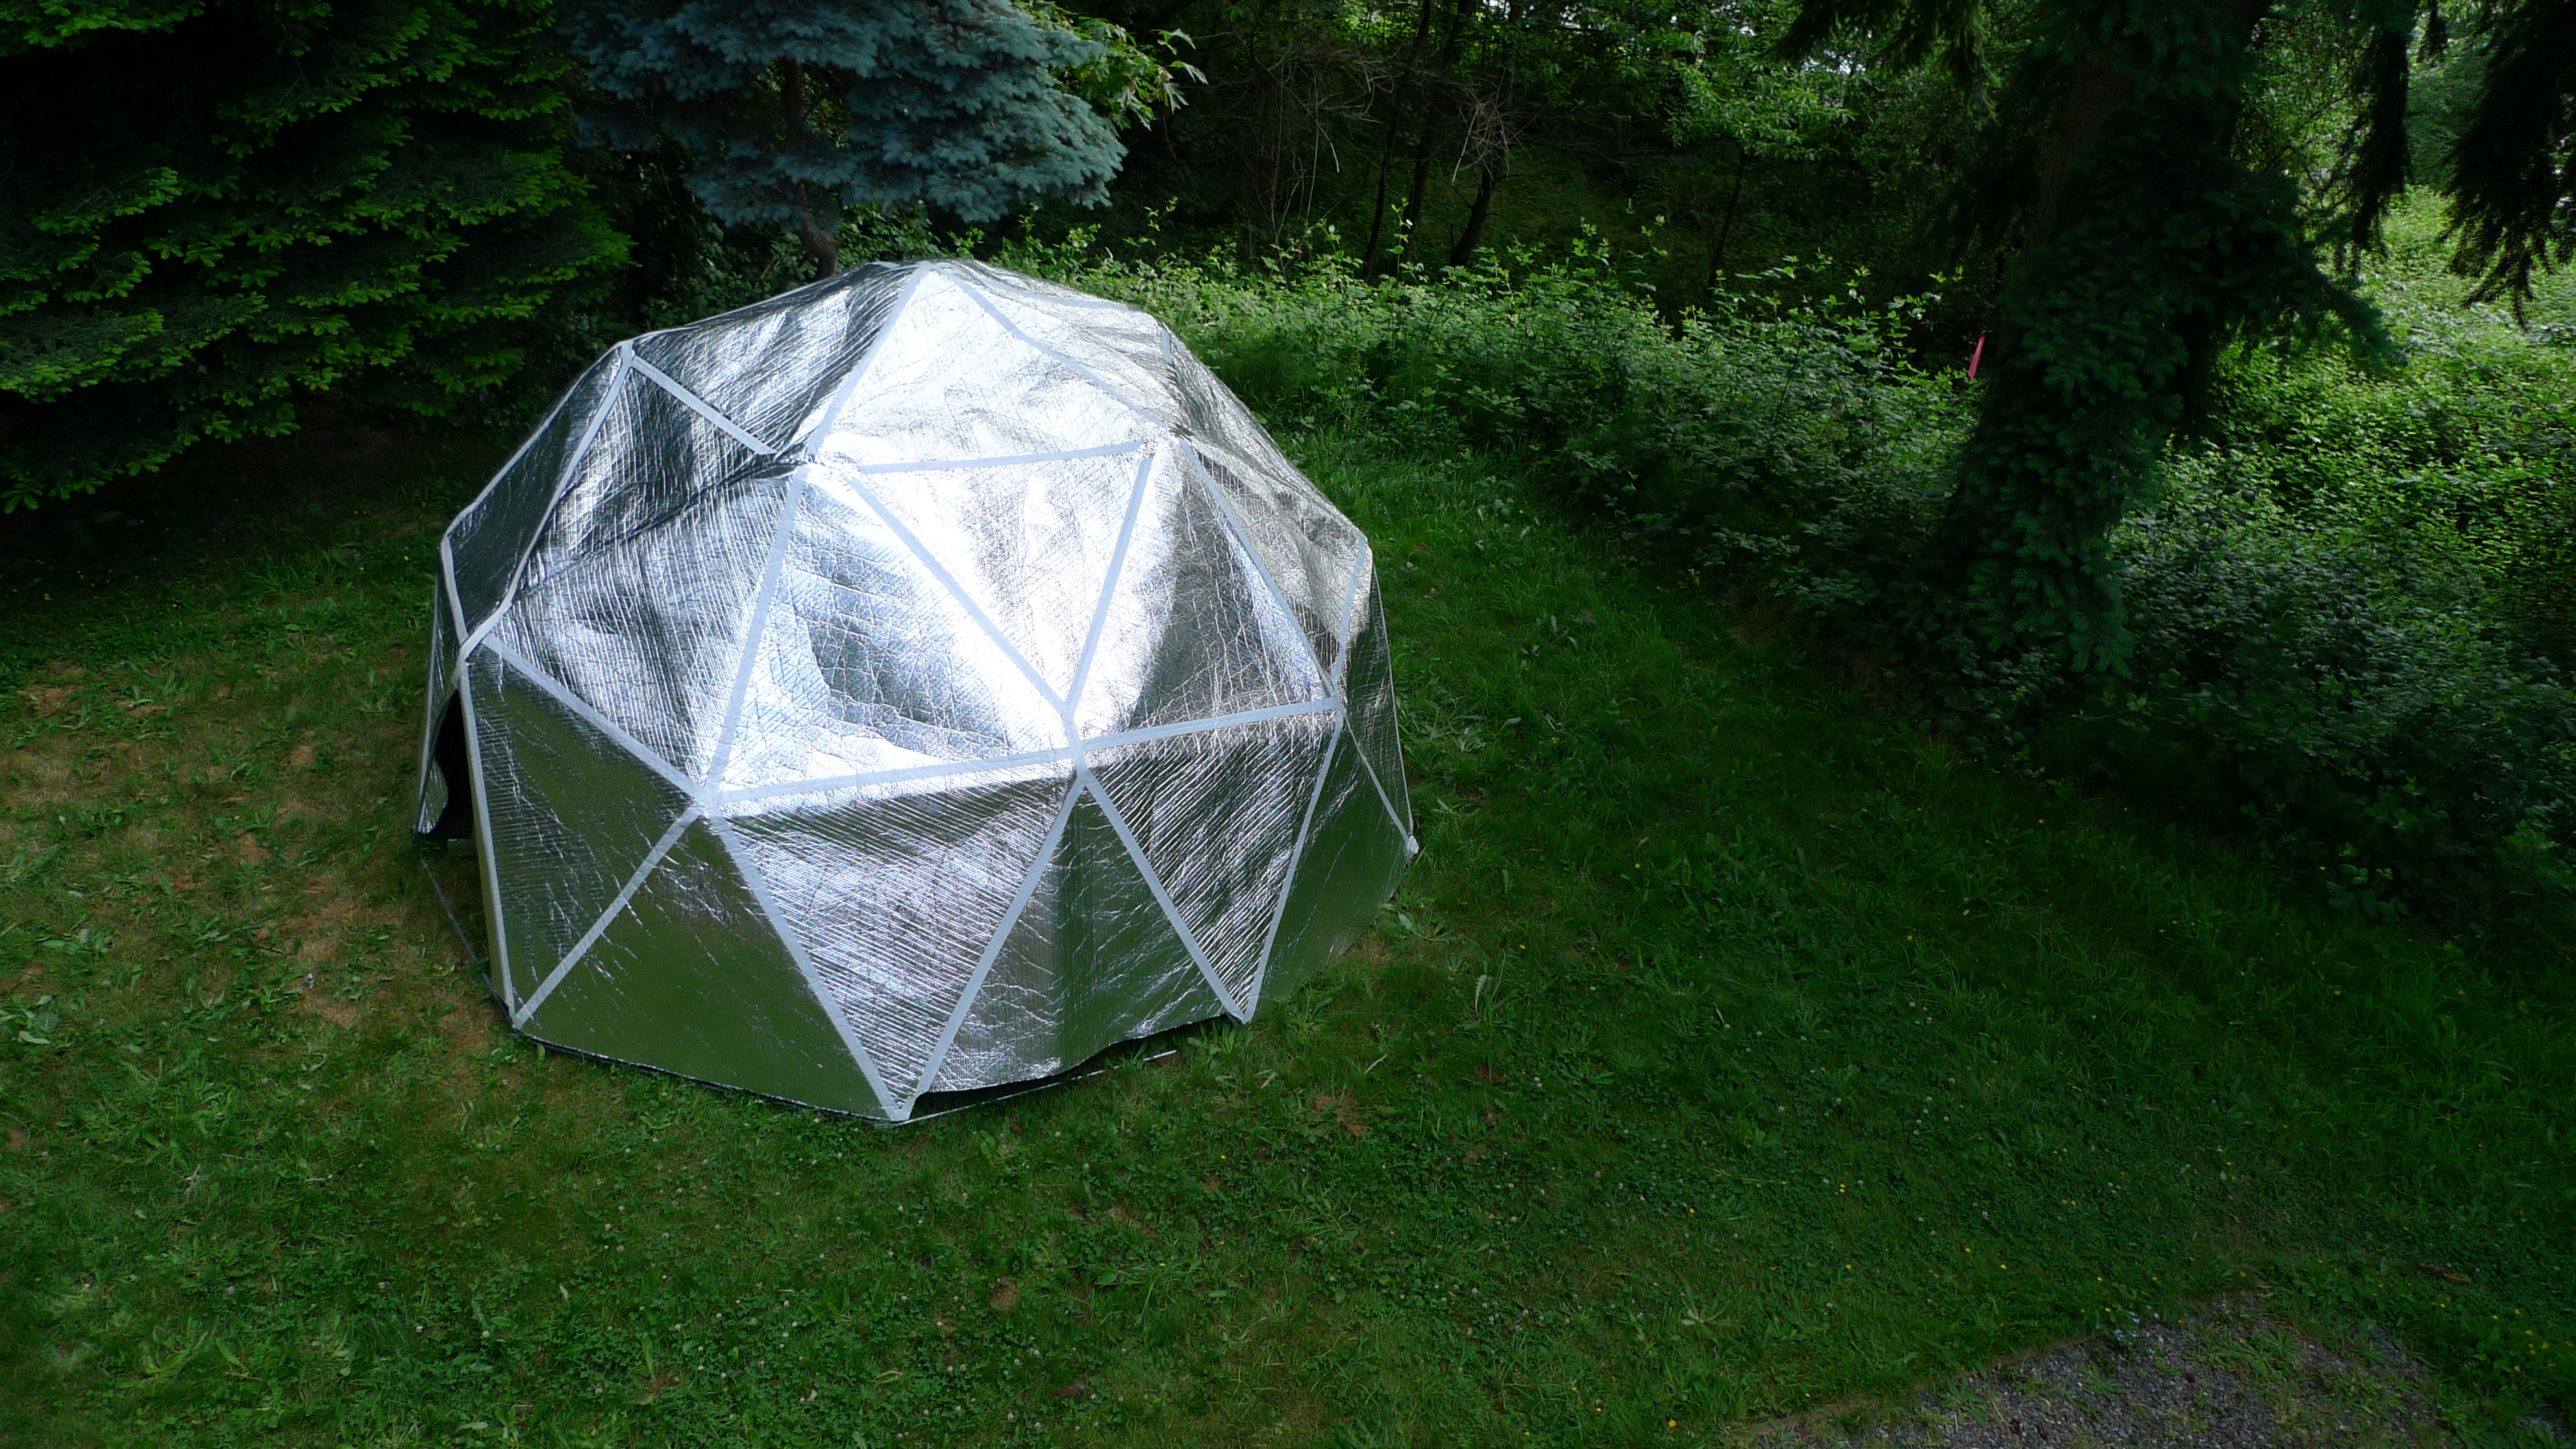
Note that the doors hadn’t been added at this stage yet. For the doors I simply doubled up a big reflectix triangle (equalateral 5′ 1″ ) one attached on either side of each door (there were two doors on either side to create a draft). The lower tip of the door had a fat grommet in it (use some extra fabric or tarp material to thicken the material around the grommet and fold over the corner before putting the grommet through so that it doesnt rip out of the reflectix) to tie it down. The doors would close over each other like the two sides of a big jacket or something like that, and were quite effective.
And the cover collapsed (struts for size comparison)
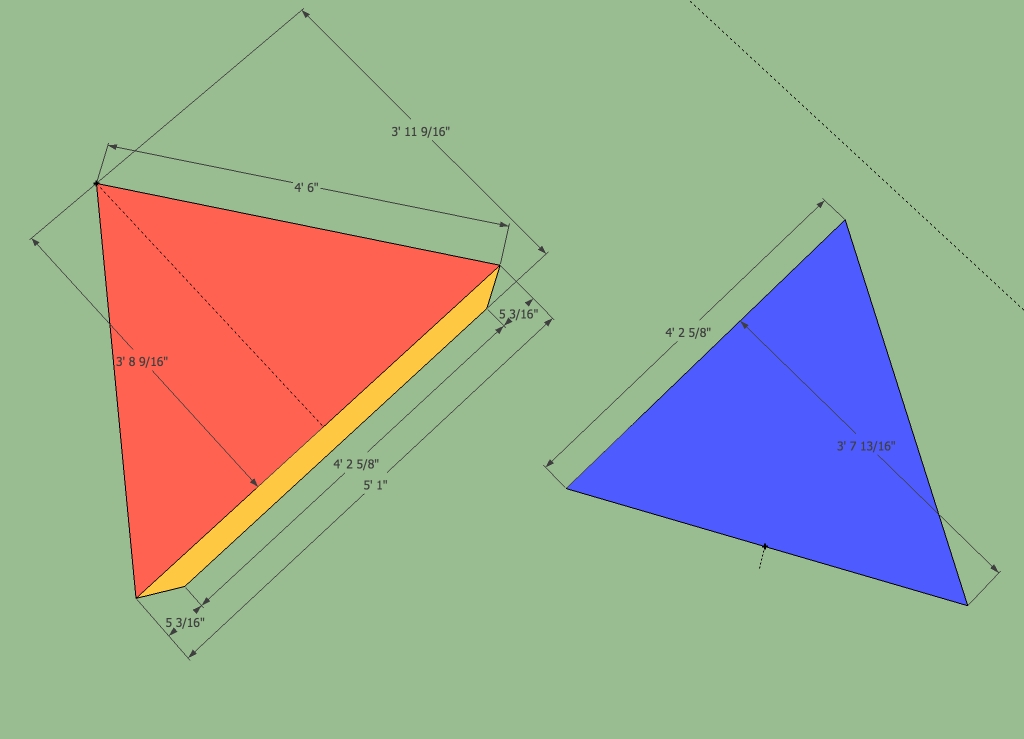
When figuring out the triangulation of the surfacei ran into some problems and devised some simple solutions. The naive way would be to simply cut appropriate triangles that reflect the geometry of the geodesic structure. I.e. one triangle would be an equalateral triangle with edge length 5′ 1″ and the other would be an isosceles triangle with a base length of 5′ 1″ and two sides of 4′ 6″. (Have a look at the tiling diagram above and consider the side lengths). The rolls of reflectix come in 48″ wide. Now consider how to fit the triangles onto the 48″ wide roll. The smaller, isocles triangle (red in the pictures below) poses no problems – it’s height is 3′ 8 9/16 ” , almost 4′ and fits almost perfectly. The bigger one however has a height of 4′ 4 13/16″ , almost 5″ too wide to fit onto the roll!. Buying wider rolls would create huge waste and cost considerably more, and thus was not an option.
So the solution was to move the boundaries! Look at diagram 1 below. if we take a band 3 inches off the bigger triangle on each side (shown in yellow) and make it part of the smaller triangle, we end up with the same surface area covered around the big triangles and two new pieces for tiling. One is a smaller equalateral triangle with a height of 3′ 7 13/16″ and the other is a strange pentagonal shape consisting of a isocles triangle and a little 3 inch wide lip with a new height of 3′ 11 9/16 ” . Now both heights are less then 4′ and everything works perfectly!
The two shapes tile nicely one up one down onto the rolls creating a zigzag sort of pattern of cutting lines. A little more trimming is required to get the litle corners right. I actually didn’t cut those off until assembly time because it was useful to have a little leeway at the corner connections since the gluing and cutting process is far from precise. In total 10 blue shapes and 30 red shapes are needed. Oh plus two extra blue ones for the doors (i doubled up the door, see above).
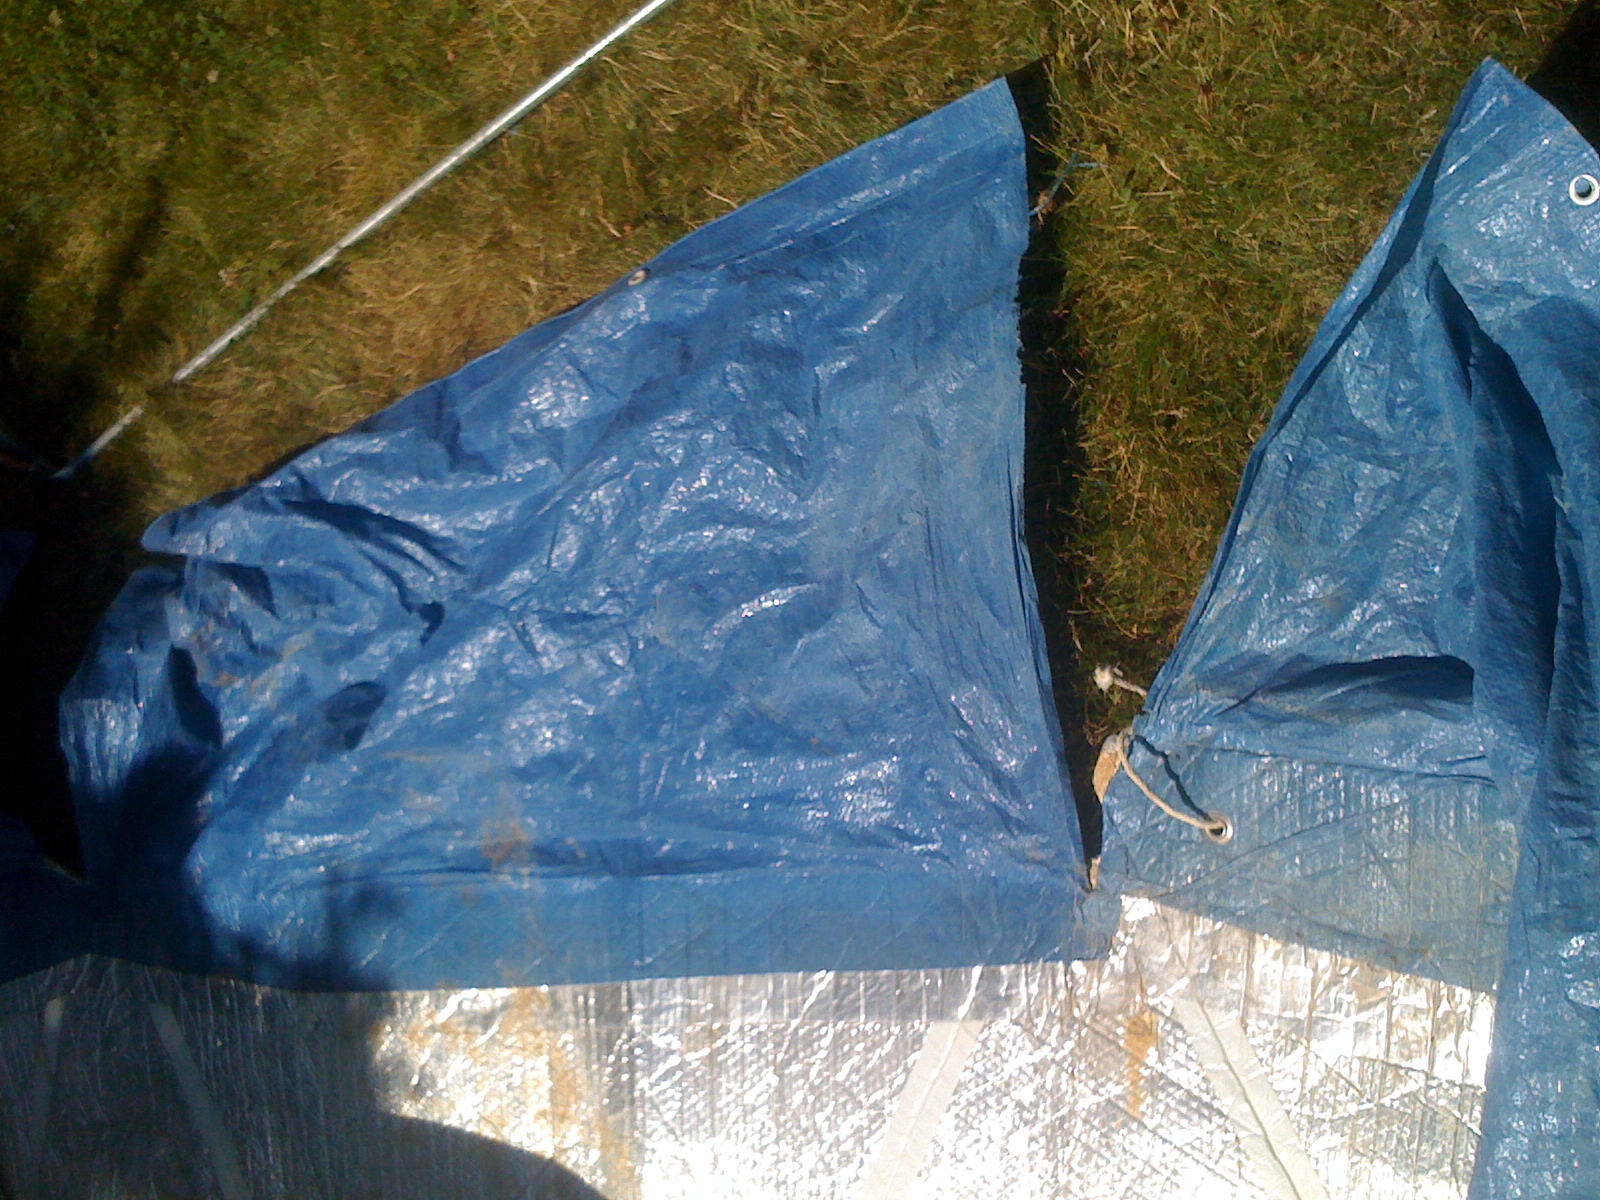
Finally, to prevent dust coming into the dome from underneigh i glued a skirt to the bottom of the dome out of strips of tarp which folded under the base struts into the dome and were held down with simple nail-shaped pegs through grommets in the tarp material. The tarp strips were about a foot wide or so (I have no pictures). Finally i layed down an old carpet inside the dome (found in a dump) and a futon on top to make a comfortable living space for us (we were on the playa for two weeks after all).
Things I would have done differently in hindsight.
- Dont buy their aluminum tape – buy general purpose aluminum tape, its just as good, often wider (thus stronger) and way cheaper.
- Apparently you can find cheaper Reflectix-like material. FOr example this shipping material comes in larger sheets and is cheaper i believe then the stuff you get specifically for home insulation at HomeDepot or similar.http://www.uline.com/BL_472/Cool-Shield-Bubble?keywords=Insulated%20Shippers%20%20Supplies
- Coordinate the dome size with the pieces used for the cover then you dont have to do any special workarounds like I had to. Unfortunately in my case we already had the frame so I had to deal with it.
- Rather then gluing on a tarp skirt to wrap underneight the dome, just make the bottom Reflectix pieces larger. That would have saved a lot of time.